Blogging is not as easy as it may seem. Writing articles while lying on your bed might sound like that is all that’s involved in creating great content, but people who actually do this work know that it couldn’t be further from the truth.
It’s not difficult to create articles if writing (and the topics about which you write) is your passion. But it takes a lot of time to carry out all the technical steps, from formatting the final product to optimizing the article for Google search.
The good news is that there are a lot of tools that can automate these processes for you so you can concentrate on the fun part: writing.
It this post, I’m going to share the tools that I use to carry out all these elements.
Learn More: 10 Ways to Generate Topics and Write High-Ranking Blog Posts
STEP 1: Use Buzzsumo to Decide on the Topic
First of all, you need to find an appropriate topic for your article. You can have a bunch of brilliant ideas, but you’ll need to do a little research to make sure that your idea hasn’t been covered by someone else (or hundreds of others).
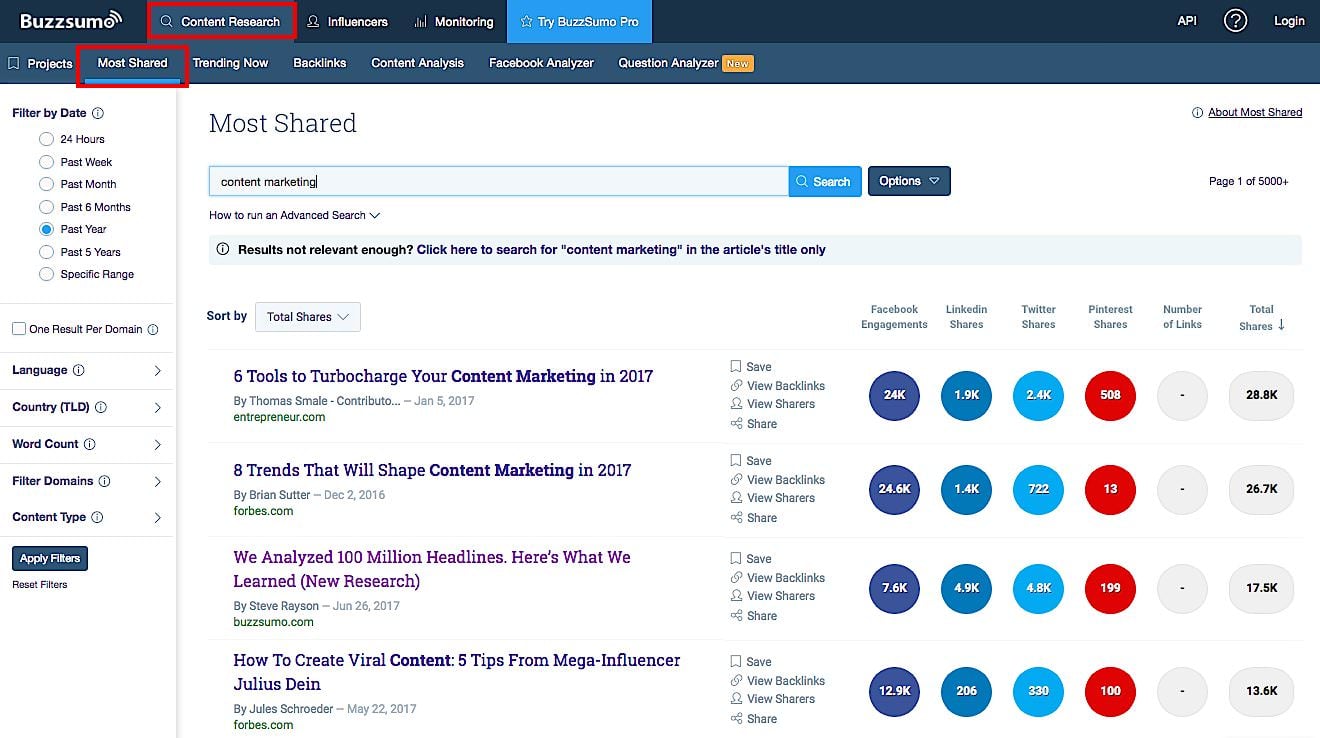
I use Buzzsumo to do a little research. This tool allows you to find the most-shared content on any topic. It’s useful to:
- Make sure that your idea (or similar) is interesting for people right now
- At the same time — make sure your idea is not overused. There is no need to write content on topics that have been covered to death, especially if the existing articles are comprehensive and excellently written. However, if there are a lot of posts on similar topics that are low quality, then you can give it a try.
- Analyze competitors’ content to find out what they’ve missed as well as what their strong points are. You can brainstorm ideas this way, but make sure that you’re not writing the same article.
- Find bloggers who also are interested in your topic and ask them to share your article (click on “Share” that is listed to the right of the title).
You can choose the date and sort by language, country, type of content, and word count. Also, you can choose certain social media platforms (Facebook, LinkedIn, Twitter, Pinterest, and Google+).
Even if you find articles on your topic, don’t give up hope. Analyze all these posts and figure out how you can write something that is 10x better: update it, add more research and statistics to it, make it twice or five times as long, add your own point of view or expertise, etc. There is always a unique angle you can add to improve it and make it your own.
Once you’ve settled on a great topic and have figured out how you’re going to make it better, go to the next step.
Learn More: The Content Marketer’s Guide to Keyword Research
STEP 2: Use Serpstat to Handle the SEO Factors
Serpstat is an all-in-one SEO platform that consists of five modules to help you rank higher. This tool can be useful in the following ways.
Keyword Research
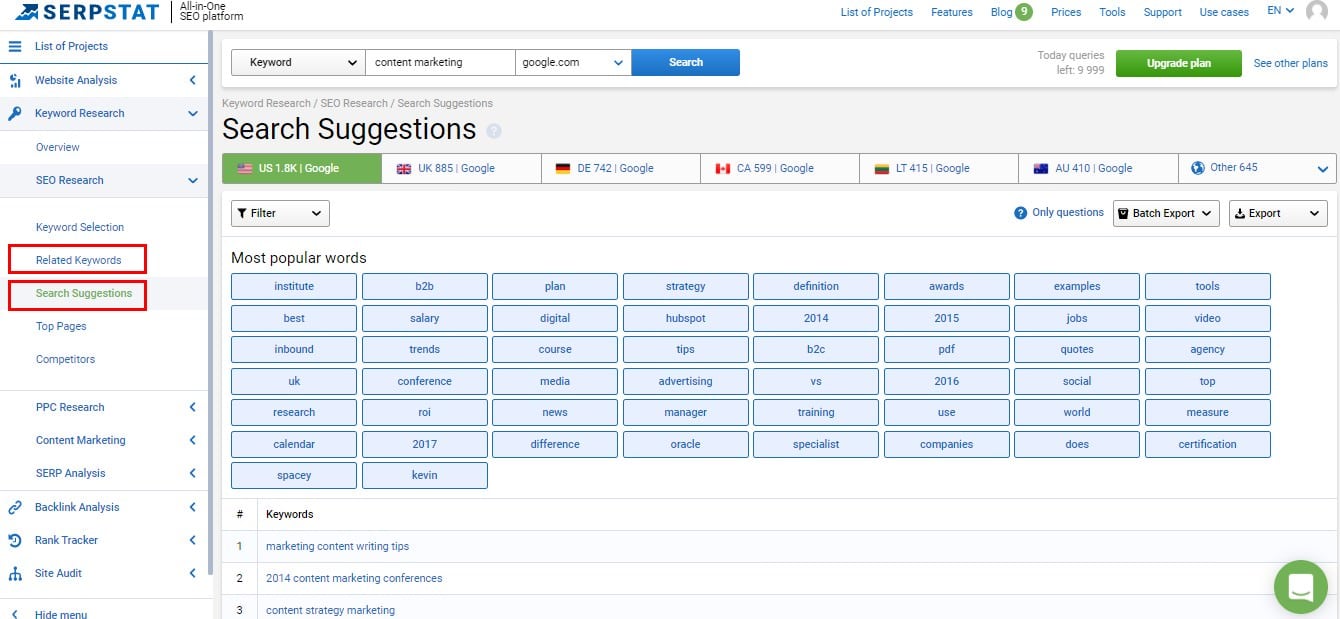
It has a great keyword research tool that makes finding keywords for your post a lot more efficient. It also has additional ways to expand the keyword list, such as Related Keywords and Search Suggestions.
Related Keywords are LSI (Latent Semantic Indexing) keywords that can help make your article sound more natural. These keywords are semantically related to the primary keywords for which you are searching.
For example, here is a small list of LSI keywords for a “Windows” query:
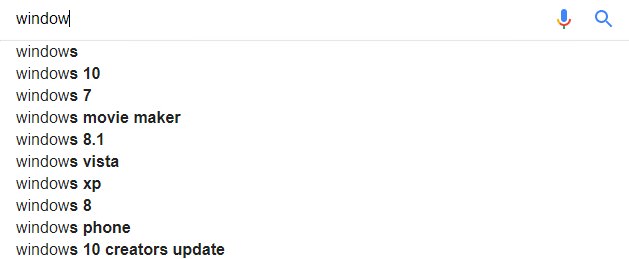
The Search Suggestion feature performs queries that pop up under the search bar when you’re typing something into Google, YouTube or Amazon.
This should look very familiar to you:
The tool gathers all these keywords in one place and then you can export this list into a spreadsheet.
With this huge assortment of keywords, you’ll be sure that your content is optimized for the Google bots and readable for the human being.
Competitors’ Articles
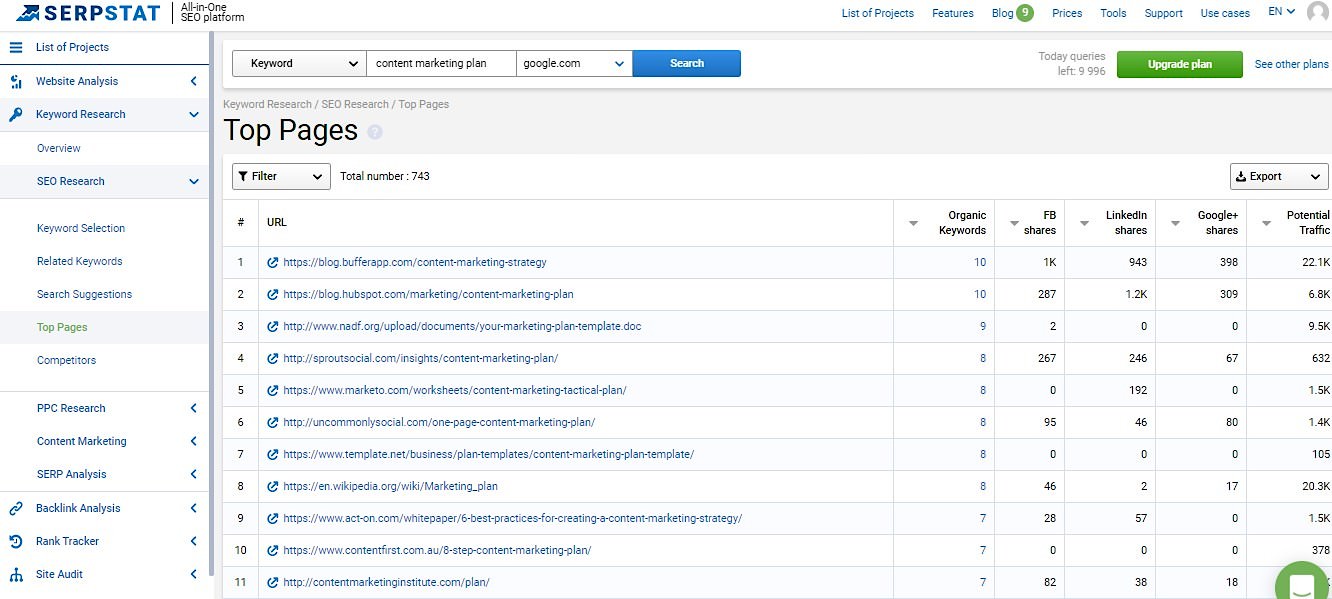
Also, you can check if your competitors have successful articles on your topic. This tool sorts the “Top Pages” by number of organic keywords used, which makes it easy to glance through the list to make sure your idea hasn’t been covered. You’ll also see how many Facebook, LinkedIn and Google+ shares it’s gotten, as well as Potential Traffic.
In the screenshot below, you can see who’s written on the topic of “content marketing plan.” Buffer and HubSpot both take top place for number of organic keywords used, but HubSpot and Sprout Social take top place for social shares, which means more eyes on the article. Also note that, despite low numbers for keywords and social shares, Wikipedia is up there with Buffer for traffic to its website.
I usually take three direct competitors and check their top pages. If I find something similar to my idea, I read the posts, analyze them, and only then start writing. For your convenience, you can create a spreadsheet for the analysis:
The columns may differ depending on your goals, but the point is to keep track of what’s been written so you can improve upon it!
Article Structure
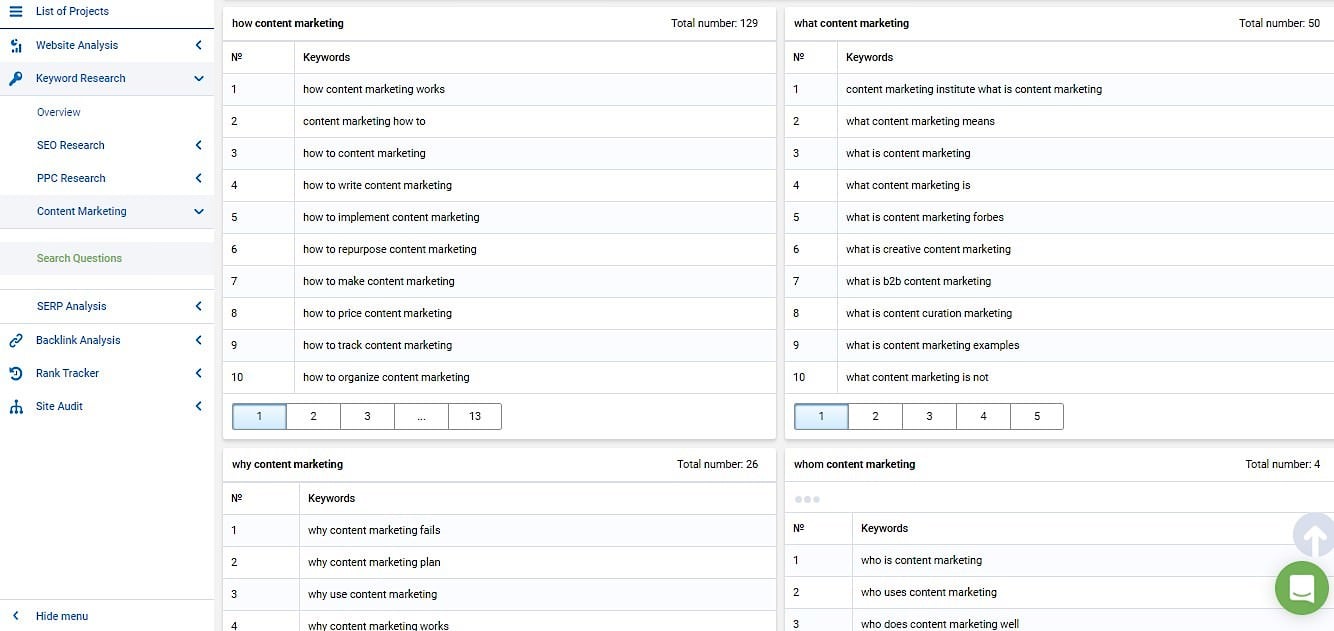
Once you’ve finally decided on which topic to write and how you’ll create better content than the competition, you need to find out what exactly people want to know on this issue. I use the Search Questions feature for this purpose:
It lists the top questions that people are typing into Google, YouTube and Amazon. Honing in on exactly what people want to know on your topic will allow you to answer those questions in your article, as well as in your title, making it easy for people to find your content after searching for this query. This huge list can help you create the structure for your article by using additional, similar titles as subheaders.
Also, you can check question-and-answer platforms like Quora and Reddit, or Google “best SEO forums” to discover valuable resources. I suggest choosing only those questions which haven’t been answered in depth yet to make sure that your article stands out.
Learn More: How to Write Hero Headlines to Skyrocket Click-Through Rates
STEP 3: Use Grammarly to Check Mistakes and Avoid Plagiarism
You’ve decided on a great topic and after doing your research have written a unique, 10x article. Now it’s a good idea to set it aside for a day or two to clear your head before going back and editing it. You may think it’s a perfect article after only one draft, but I can assure you that it is laden with mistakes. You just can’t see them yet because you’re too close to it.
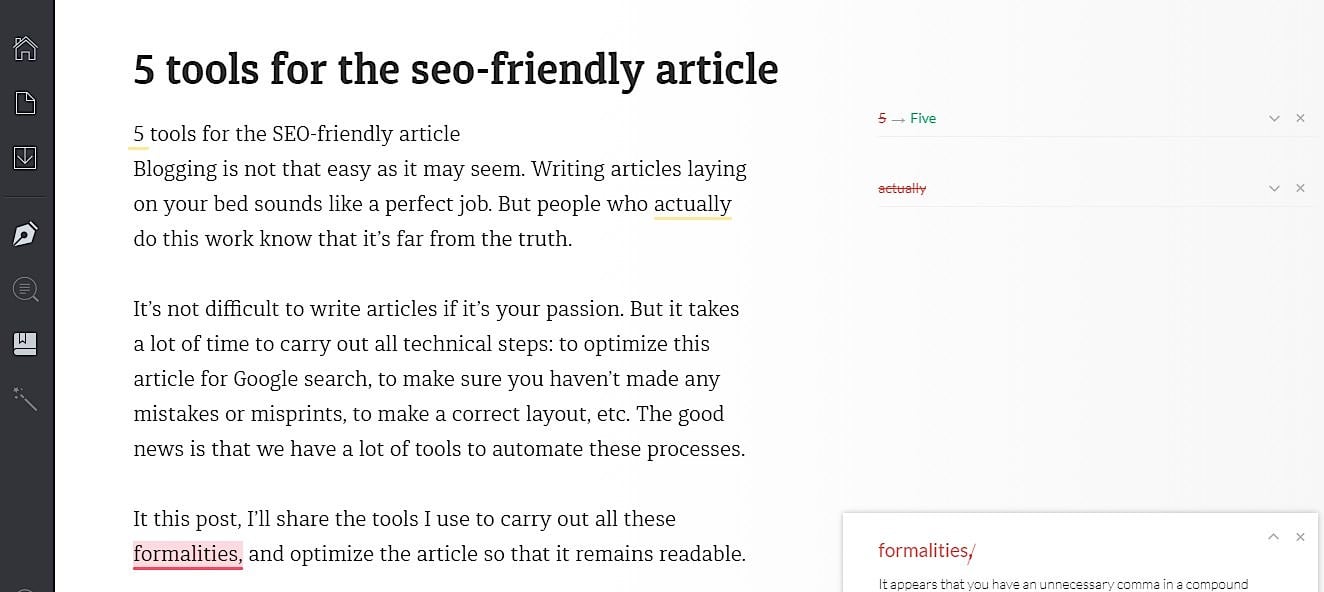
When you’re ready to go back and edit your article, I suggest checking it with Grammarly, a free grammar, spelling and syntax tool. It will also let you know if you’ve overused some words (and offer synonyms) or if a sentence is too long and difficult to read.
It also has a plagiarism checker which crosschecks your text against over 8 billion web pages and highlights all parts that you should change in order to avoid being accused of stealing.
Even if you’re a native English speaker, this is a useful tool although, as with any tool, you shouldn’t rely on it entirely.
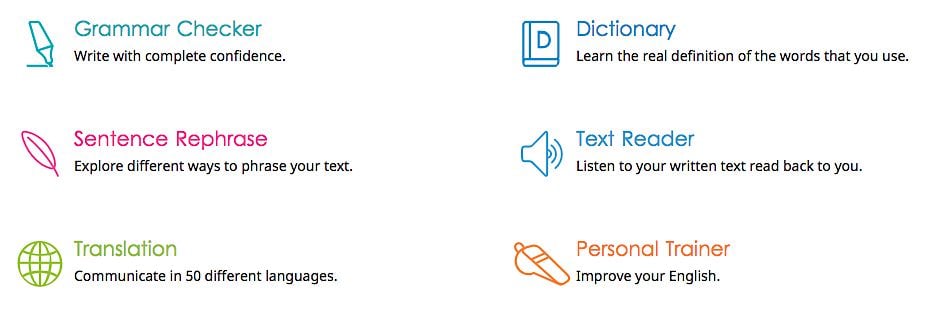
I also recommend Ginger Page, a similar app, to check for spelling and grammar mistakes, sentence rephrasing, and translating. It can also help you improve your English with a personal trainer.
STEP 4: Use Hemingway to Be Brief
We all know best practices for online writing: short sentences, short paragraphs, subheadings, bulleted lists, etc. As of 2016, more people are surfing the web via mobile phone than desktop, and when one long, rambling sentence occupies the entire screen, you don’t really want to keep reading.
You might never be as great a writer as Ernest Hemingway, but the Hemingway App can help you write in simple, direct and clear language.
It provides you with suggestions on how to make your article as easy to read as possible by highlighting specific errors and explaining the mistake with color coding. For example, in the screenshot above, yellow means that the sentence is difficult to read, pink lets you know that there’s a simpler alternative, green means you’ve used the passive voice, and so on.
It also gives your content a readability grade. Again, don’t rely on it entirely. If you think your sentence should be a bit longer than this tool suggests, just leave it. Believe me, sometimes you do know better than Hemingway.
Related Content: How to Write Content for People and Optimize It for Google
Step 5: Use Keyword Density Checker to Avoid Being Spammy
A while ago, you could rank higher if you used as many of your keywords as possible. But these days, that is considered keyword stuffing and could get you penalized. It’s important to maintain a balance when optimizing your article. Unfortunately, there are still such websites:
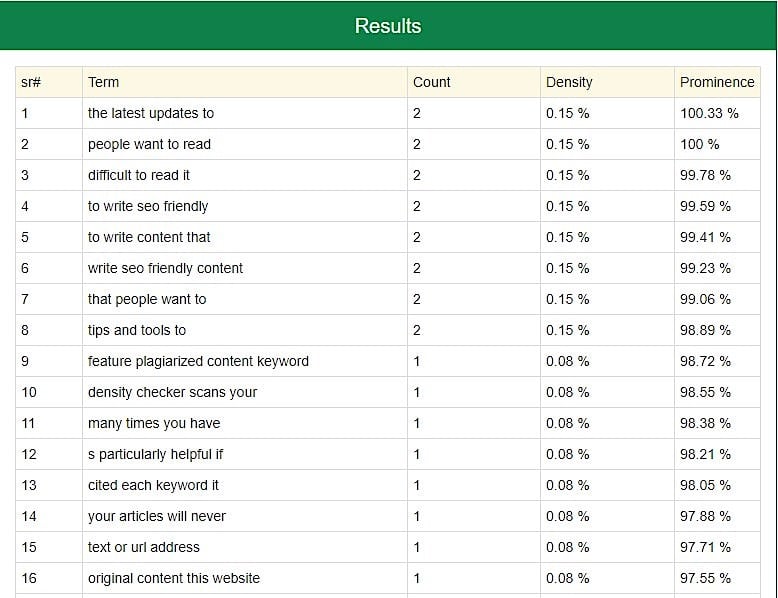
I always check my content with Keyword Density Checker:
It shows how many times you have used certain keywords on the page. To avoid using the same words within the article, you can use LSI keywords (from step number two above) or even just an online Thesaurus.
I don’t use this tool every time I edit an article because Grammarly helps me handle this issue, too, but if the post is super important, it’s always a good idea to double check.
Summing Up
This is the list of necessary tools I always use when creating content. With these simple steps, you can save a lot of time and hassle when coming up with and creating great, unique content. To sum up, these tools will help you with the following:
- Good topic (up to date, popular, but not overused)
- Keyword research, competitors’ top articles
- Grammar, spelling, and plagiarism
- Short, clear, easy-to-read sentences
- Avoiding keyword stuffing and possible penalization
Writing is much more pleasurable when you can use these simple tools to carry out the boring or technical elements of creating good content. Use these tips to make your content SEO friendly for Google and interesting for the reader.

