There are several apps and services that prompt you to grant access to your Google account. The permissions we usually grant relate to our contacts and email address. In most cases, we give access to 3rd-party apps on a temporary basis but later forget to revoke those permissions. Many people don’t even know how to remove Google account permissions for third-party apps and services.
In this guide, we will discuss how to remove access to third-party apps from your Google Account. This would prevent the apps from using any information associated with the said account. In case you want to sign out of Google account, we have a very detailed tutorial on removing Google account from Android devices.
Using the Google sign-in feature is among the most easy and convenient way of logging in to any account. You don’t need to create individual accounts for each app. Rather, just use a single Google ID to login to all your app. All your data and progress will get synced across all the platforms with ease.
But there is some risk associated with it as well. Granting access to your Google Account means that particular app has access to various information like your full name and date of birth, among others. For example, if you give an app access to your Google Drive just for the sake of uploading files, you don’t realize that they could also view edit create or delete any of your files. Although this is no hidden tactics as the apps clearly mentioned them under their policies, many of the users simply accept these policies without reading a word.
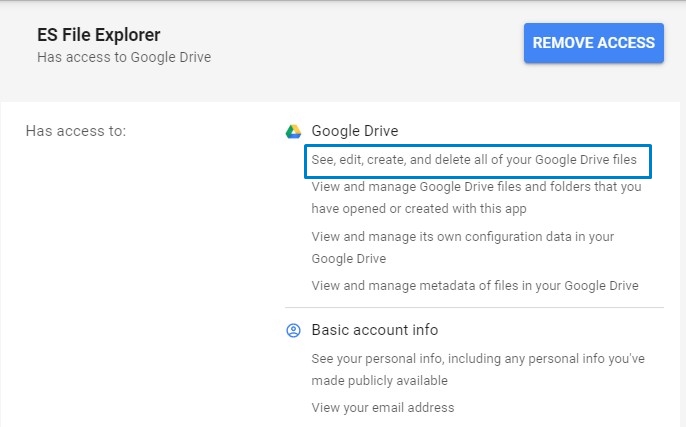
So, if you ever feel that you have granted access to an app that you shouldn’t, or an app is no longer required, then it is better to revoke its access. Fortunately, there is an easy way of doing so. The process could be done using a desktop as well as via a mobile device. Both methods are discussed below in depth.
Remove Google Account Permissions on Desktop
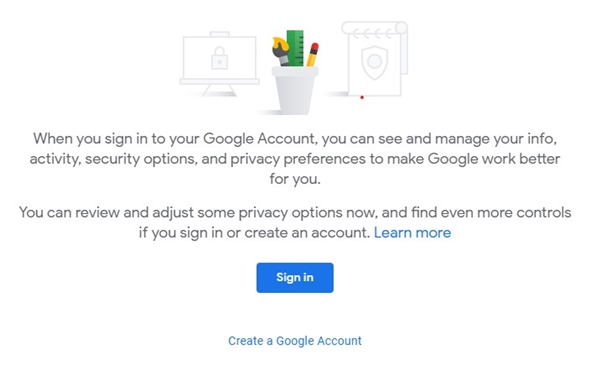
- If you aren’t logged in to your Google ID, do it now. Go to the Google Account section and enter your credentials.
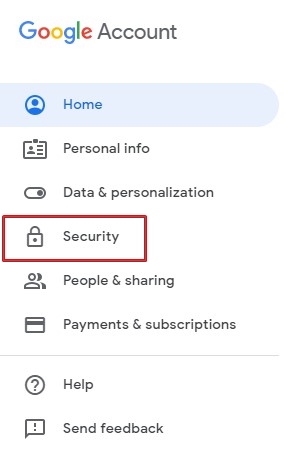
- Once logged in, you will see quite a few options on the Welcome screen. Select the Security option from the top bar.
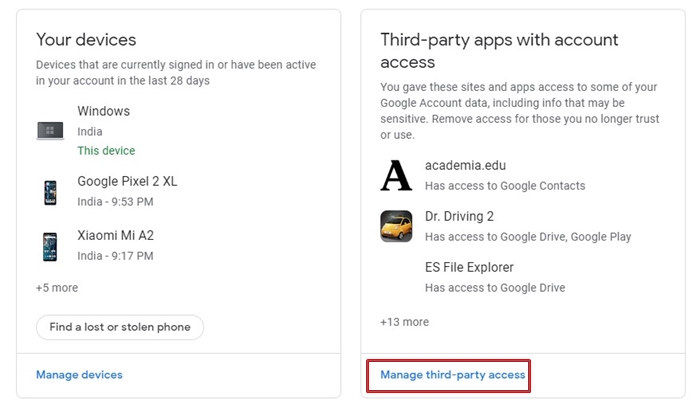
- Scroll down to the bottom until you find the Third-party apps with the account access option. This section provides you with a list of all the apps to which you have given access to your Google Account.
- At the bottom of that menu, you will see the option Manage third-party access. Click on it.
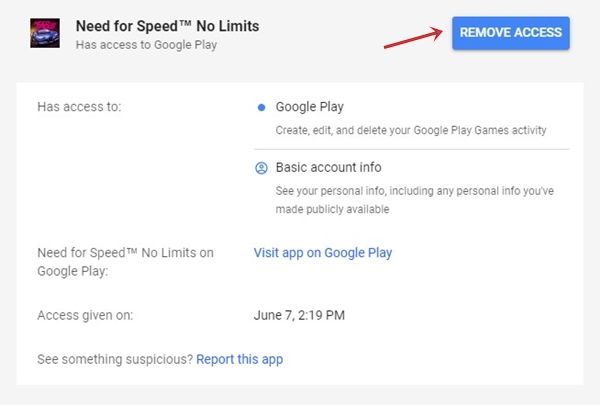
- From the list, click on the app whose access you want to revoke.
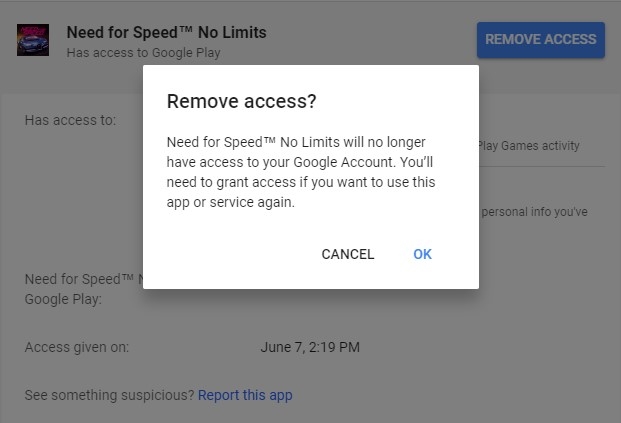
- Now click on the REMOVE ACCESS button present at the top right.
- A confirmation dialog box will appear reassuring your choice. Click on OK.
- That’s it. Google Account and its services will no longer be associated with this app anymore. Next, let’s see how to remove access to various third-party apps from your Google Account using a mobile device.
There’s another way to sign out of Google account on your Android device remotely.
Remove Third-Party App’s Access via Smartphone
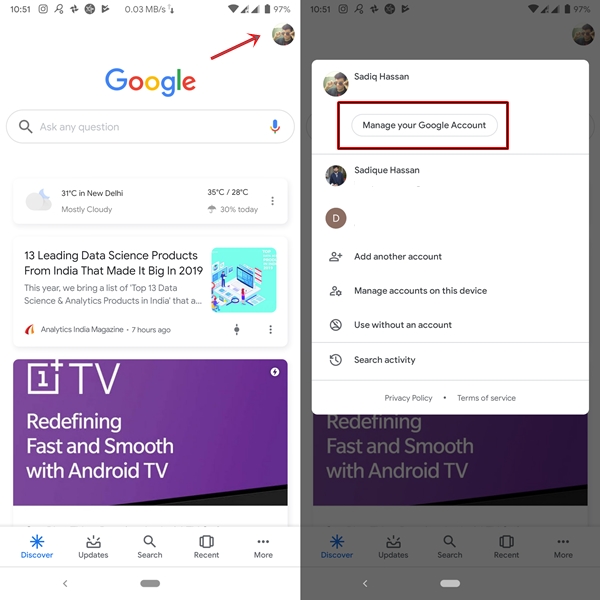
- Go to the Google app on your device.
- Tap on your avatar at the top right.
- From the drop-down that appears, select Manage your Google Account.
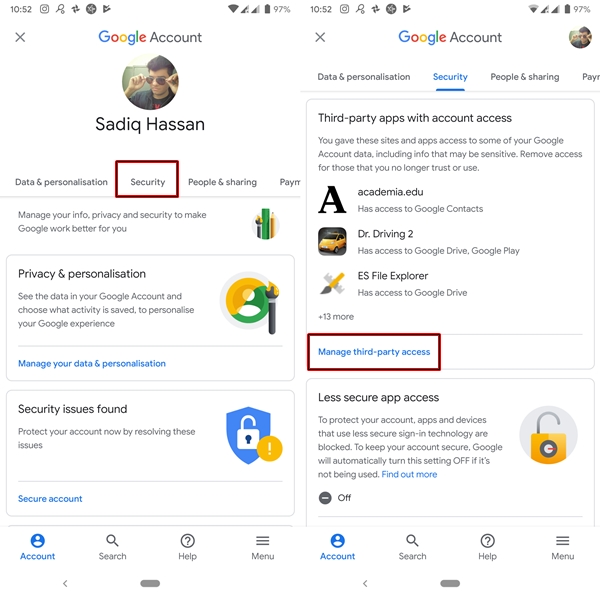
- Select Security from the top menu. You need to scroll a little bit to the right to see this option (it is next to Data & personalization).
- Scroll down till you arrive at the Third-party apps with the account access option.
- Select Manage third-party access.
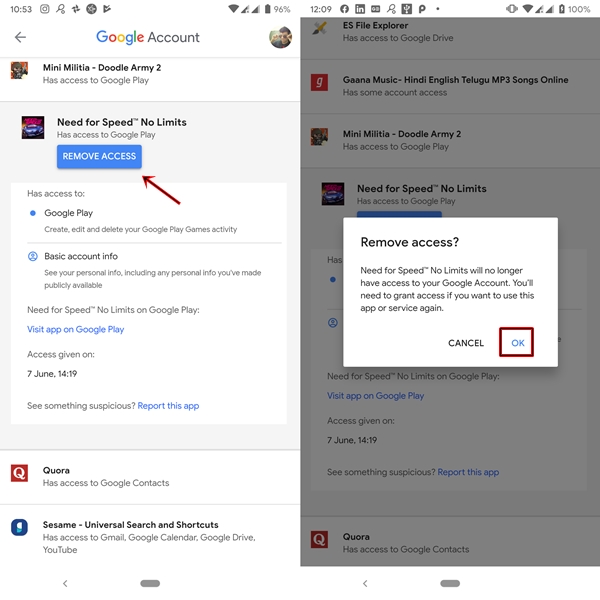
- Tap on the desired app for which you want to revoke the access and select Remove Access.
- Finally, tap on OK in the confirmation dialog box to remove the app from accessing your Google account.
So, with this, we come to the end of the guide on how to remove access to third-party apps from your Google Account. Do remember to keep a check on these security features from time to time. Moreover, it is extremely important to have complete knowledge regarding whom you are sharing your data with.
If you no longer use an app, it is advisable to remove its access from your Google Account. Do note that simply uninstalling an app from your device doesn’t mean that you have also revoked its access. For that, you will have to follow the instructions given in this guide.
Read Next: 20 Google Maps Tips and Tricks and Hidden Features
