March 21, 2018
In How to Get More out of Excel Solver I covered techniques to enhance your model and empower your analysis. One of the topics I received the most questions on is the automating the solver to solve for multiple values.
There was a brief explanation in the previous article, but nothing dedicated to how to implement it from start to finish. In this article we’ll go in depth from start to finish covering the concepts and methods step by step. By the end you’ll be able to automate any of your own personal models and scale your analysis.
To get the most out of this article you should be familiar with the basics of Excel Solver. If you need to brush up check out this comprehensive whitepaper, How to Use Excel Solver to Power Your Budgets.
How we’ll do it
We’ll leverage the macro recorder in Excel to handle most of the actual code. The record macro tool will allow Excel to convert our manual steps into VBA code.
We will then identify the key pieces of code to change. Then we will create a loop to dynamically select and replace these values and run the solver again.
This will be semi-technical but through this style of development we can focus on the process and the concepts instead of focusing on how to write code.
Setting up the macro recorder
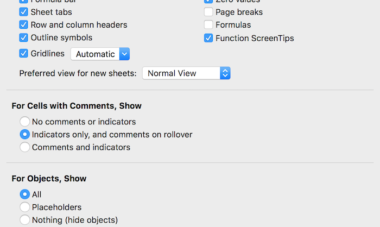
The macro record functionality is found in the developer tab in the ribbon. This is not available by default but is easy to implement. If you navigate to your ribbon options you will see a checkbox for the developer tab.
The screenshot below is for Mac but PC based Excel is similar.
If you have not installed the solver add-on you can install it via the Add-ins menu. The Microsoft support site has instructions for all platforms, Load the Solver Add-in in Excel.
Recording the macro
Now that the set up is complete we we are ready to record! Set up your workspace appropriately with all your formulas and references. You’ll want to set up everything to the point before you build the solver model.
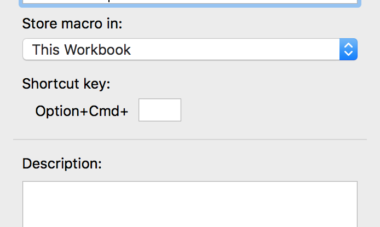
Make your way back to the developer tab on the ribbon. You will see a piece of paper with a red dot. Click on that button to open the recorder.

Give your macro a name and fill in the description if you’d like.
Once you hit OK the recorder will begin.
Go through the steps of setting up your solver and solve it. Once this is complete go back to the developer tab and stop recording. It’ll be the same location as the button you used to start the recording.

Now that we have the base code we can clean it up and prep it for the next steps.
Clean up the code
Now we can edit the code, remove any unnecessary parts, and make sure we are only using the essential pieces of the macro recording.
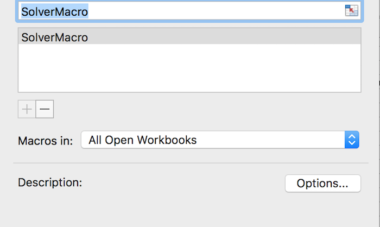
You can edit the code through Excel’s VBA editor. To access your recorded code click the Macros button.

Navigate to your macro in the new menu and click edit.
Now that we have our code editor open we can start making tweaks.
Removing Unnecessary Code
If you happened to click through a bunch of other things while recording you can clear those out now and be left with something similar to below. If there is a lot of extra code and you are worried about breaking it, you can always rerecord.
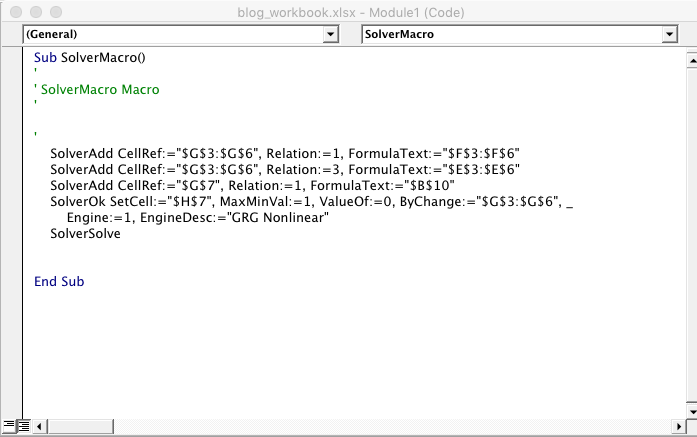
Setting up the solver references
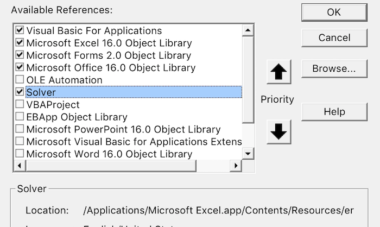
One last step before we move on, go to Tools > References and select Solver. If you don’t do this the package will not load in the macro and you’ll get an error.
You can now change your parameters open the macros menu, select your macro, hit run and it will update the results.
Let’s line up the code against our solver model. You’ll see how it lines up. The language is different but you can piece together what it all means.
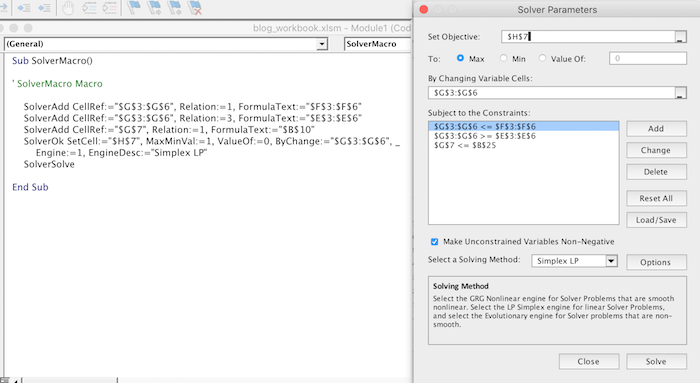
Next we’ll isolate the parts we need to change and wrap up our automation.
Rinse and repeat – building the loop
Now that we have a working solver. We need to repeat that multiple times. Let’s put an example together and cement the plan.
We started with a budget of $1,000 in the first model but we want to do the same thing for $100 increments up to $2,500.
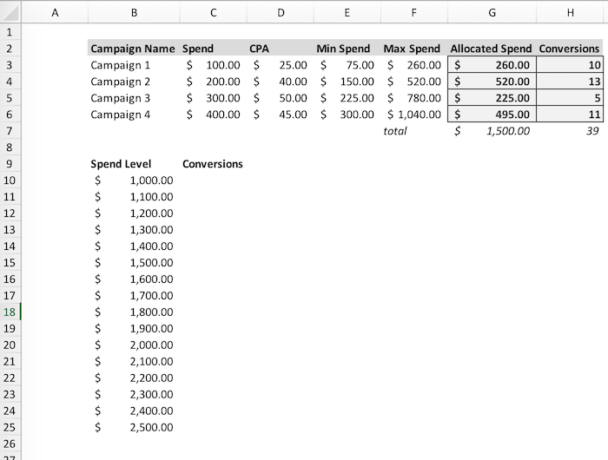
Let’s dive in! We have a list of values in column B and our output in column C. If we wrote out the process it would look like,
- Set total spend to the value in B10.
- Solve the model.
- Place the output in C10.
- Choose next B value.
- Set the output in the C row.
- Repeat steps 2-5 for all values in B.
Starting the loop
Loops are coding constructs that repeat an action until hitting a logical end point. A loop will come in handy here to repeat the same process, running the solver, on every value until we reach the end of the value.
For this example we’ll define the end point by the number of rows. B10:B25 has 16 values.
We’ll start our loop and wrap it around our solver code. We’ll set up a variable to hold the loop number (i) and go through each value, solving the loop each time.
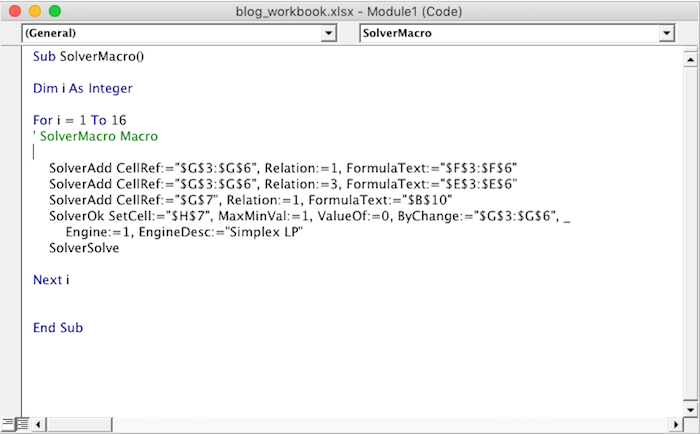
Resetting the solver
We’ll add another more condition at the start of our code. Since we want to rerun the solver each iteration, we’ll reset it each loop. This will clear the settings and start a fresh model.
We can do this via SolverReset.

Updating cell references
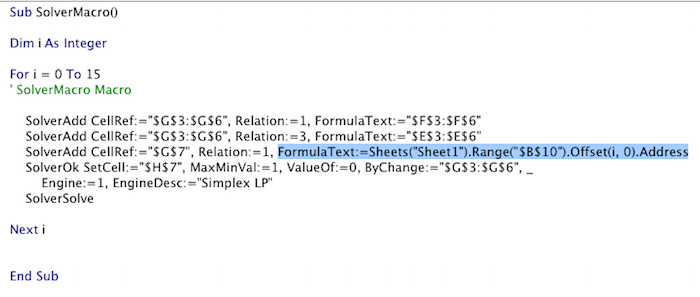
We now solve sixteen times but need to update our cell references. While we originally referenced B10 we need to move down one cell each run to update the limits. We can do this via the offset function. We can update “$B$10” to reference the cell then offset by i rows (0 on the first run, 1 row on the second, and so on). Each time the loop runs, i increases by one.
Collecting the output
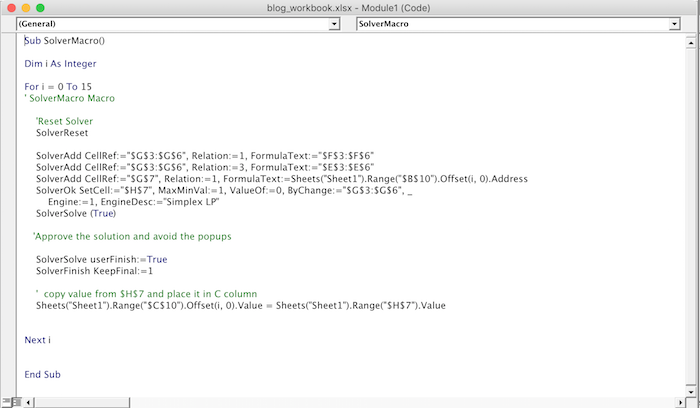
The output will change each time so we’ll want to save it. We can follow the same process above but offset from C10 and set it equal to the value of the solved model. Then the loop starts over.
We’ll call C10 offset it by the appropriate number of rows then paste the value of our output.

Sidestepping the solver notifications
Let’s save ourselves a headache and not learn by example for a moment. Remember when you ran the solver and that menu popped up asking if you’d like to accept the solution? That will pop up every time if you don’t disable it. Imagine if you set up a loop with 100’s of values, you’d have to click accept every time!
Go ahead and add the following lines after your solver code and add (TRUE) to SolverSolve. This will mimic you accepting the changes.
Now we have the finished code!
Up and running
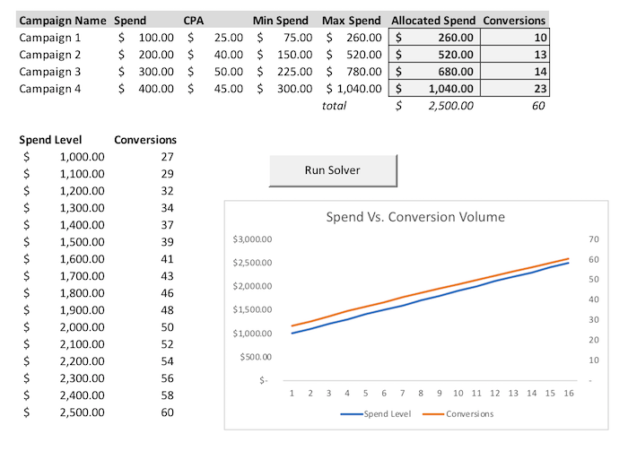
We can now run the code by selecting it from the macro list and running. If you’d like to use your workbook as a template you can assign the macro to a button for ease of use. You can find these in the developer tab.

You can also add any comparison graphs. In this case we want to compare the rate of spend growth versus the conversion volume growth. This example isn’t interesting but real data can help reveal efficiency breakpoints
Conclusion
We covered quite a bit! Congratulations on getting your automated solver up and running. The example we covered was overly simplistic, but you can take the same concepts and apply it to any solver model.
This can save an enormous amount of time for models you need to solve multiple times and encourage users to experiment with different scenarios.
