
February 13, 2018
Why Account Managers Need to Know GTM Basics
As an account manager, I believe in being able to handle most things myself, within reason. While having Google Tag Manager knowledge is not a requirement of my job it feels very necessary, plus it’s fun. I have had clients that fall into different parts of the spectrum, but a few reasons you may want to get the basics down:
- Clients lack the knowledge and expect you to implement tracking or guide them
- Clients and their development teams are busy and you have to wait eons to get tags created
- You can troubleshooting quickly when tracking goes wrong
- The client has new, frequent conversion opportunities popping up and they can’t keep up (such as reports or white papers)
Permission Options
Google Tag Manager has several different permission options: no access, read, edit, approve, and publish. I recommend having your client add you with edit permissions.This option will allow you access to create new workspaces, tags, and triggers as needed but doesn’t let you publish live to the website. This removes any liability for breaking tracking or accidentally publishing other users changes unless you have a solid experience in GTM and you have a rapport with your client.

Tags vs. Triggers
The difference in tags and triggers confused me initially when I was first learning GTM. It wasn’t until I actually got into the interface and started playing around that I understood it fully. Hopefully, I can explain it in a way that lays a foundation of understanding that you can build on with hands-on experience.
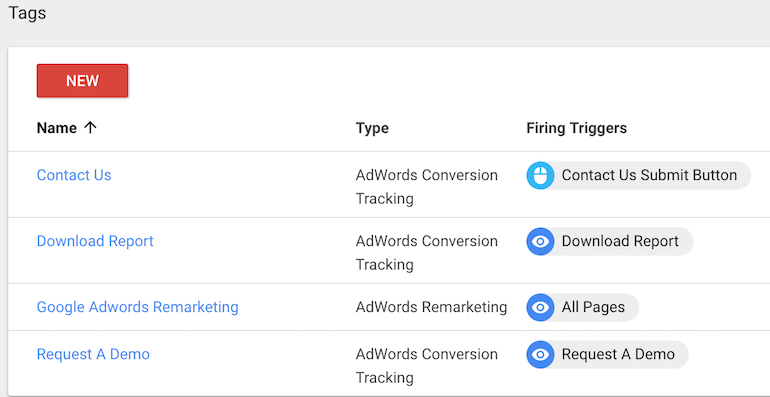
Triggers are created in order to determine what action to track on the website. For example, if I want to track page views with a certain URL or a click on a submit button, the trigger is set up in a way to track those specific actions. Triggers are non-specific to any platform so you only need one unique set of triggers based on the actions you want to track on the website.
Tags allow you to link the trigger to a platform to begin tracking that website action through that platform. GTM has several platform options built in to choose from such as AdWords, Bing, LinkedIn, Crazy Egg, and many more.
As an example, let’s say I want to track a form submission that leads to a thank you page URL for AdWords and Bing.
- Create a trigger that fires when the URL matches my thank you page URL
- Create a tag that uses the above trigger to link the form submission conversion to AdWords
- Create another tag that uses the same trigger from above to link the conversions to Bing

Event Tags
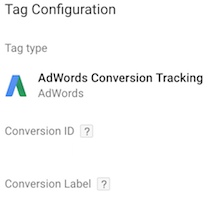
To create event tags you will need to match the tag configuration options with information in the event code. Step one is to create a conversion action in AdWords/Bing, which will populate a customized code snippet. Take the AdWords conversion ID and conversion label from the snippet and input into GTM for that tag creation. For Bing, you will need to input the event category, action, and label.

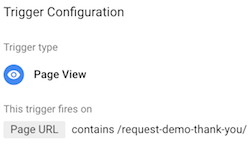
Event triggers for actions that don’t lead to a destination URL are slightly more complicated for a beginner and won’t be covered here. However, there are several resources online for each type of trigger you may need to create. One of the most common is click events, which you can find a basic example in the article, Tracking Click Events in Google Tag Manager.
Universal Tags
Prior to creating specific event tags, you will need to create a universal tag for AdWords and Bing. The universal tags will collect data from all website pages. To create a trigger for universal tags you will select the page view trigger option and set it to all pages. This means that the trigger fires on every page of the website. Next, you will create a new tag for each platform, fill in the tag configuration options and select the all pages trigger that was just created. You can find the tag configuration options within the universal code snippet, similar to the event tags.
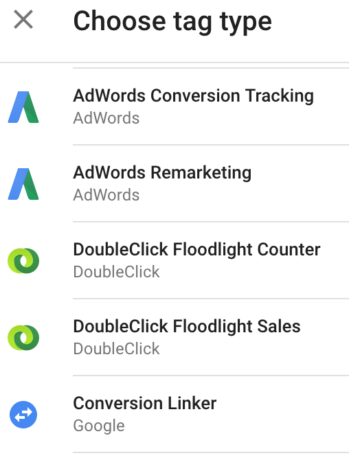
Adwords requires an additional step, which is a conversion linker tag. This tag is created the same as the others but you will choose the tag type called “conversion linker” in place of the platform. The trigger will be the same all pages trigger.
Troubleshooting
To make sure Google Tag Manager is working all together you can install a Chrome extension called Google Tag Assistant. If GTM is not listed or is highlighted red then GTM is not working or installed properly.
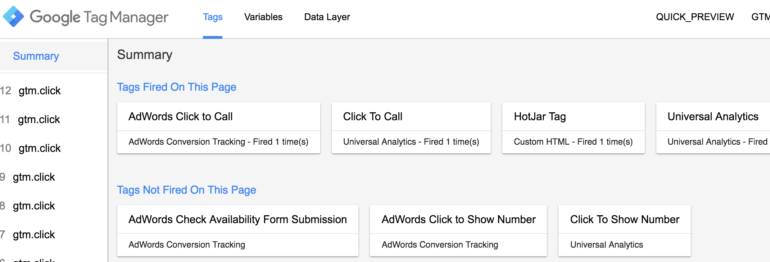
To make sure your individual tags are firing Tag Manager has a debugger console. You can get to this through the GTM interface by clicking the preview button in the top right. Next, open your webpage in another tab and you will see the console in the bottom part of the page. It will tell you what tags are or are not firing. In this example below I clicked the “click to call” button on the page to test and my event tags for both AdWords and Analytics fired so I know it is working properly. If you are having trouble enabling preview mode, switch to an incognito window.
Conclusion
Once you get the basics down I encourage you to keep reading online resources and learn all the different trigger types you can create. If you are in the digital marketing realm this will be a very helpful skill to have. Also, if your client is new to Google Tag Manager and needs to implement it from scratch check this article, How to Migrate to Google Tag Manager.