The portability of mobile devices has almost negated the use of documents in hard copy. With the ability to easily scan any documents using an Android device and then having its backup safely stored over the clouds have further reduced the need for printers. But no matter how easy it gets while handling these soft copy, you just can’t simply ignore the usefulness of the hard copy printed documents. And the process becomes even easier if you could take a print out of these documents using your Android device. So, in this guide on how to print documents using an Android device, we will be covering just that. Also, since we are about to use Google Chrome in this process, make sure to get yourself acquainted with the tips to get the most out of Google Chrome browser.
Steps to Print Documents with Android Device
The process will require the setup of Google Cloud Print on both your Android device as well as PC. For your convenience, this guide has been separated into different sections- one for PC and the other one for Android devices. Another important point worth mentioning is the fact that your printer should be connected to the same Wi-Fi network as your PC.
Setup Google Cloud Print on your PC
In order to take a print out of any documents using an Android device, the first step involves adding a printer over to the Google Cloud Printing service. Let us see how this could be done:
- Open Google Chrome Browser.
- Click on the 3 vertical dots present at the top right.
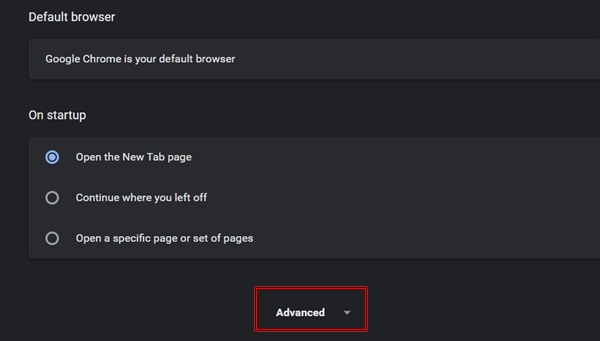
- Next, go to Settings and scroll down to the bottom. Click on Advanced.
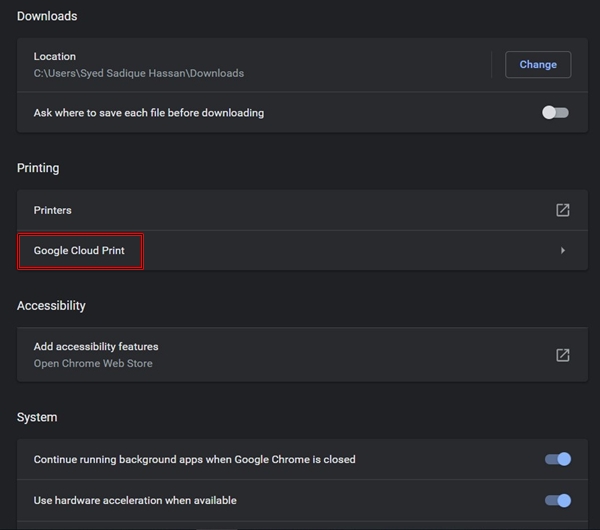
- Scroll further down until you reach the Printing option.
- Click on Google Cloud Print.
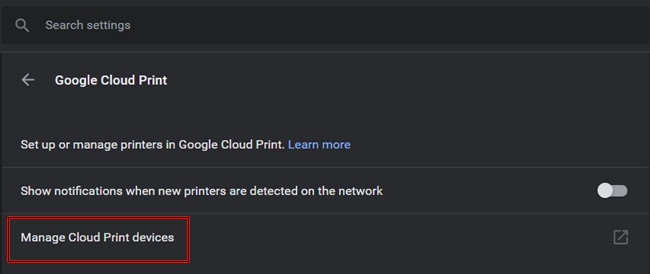
- Next click on Manage Cloud Print devices.
- A new tab named Devices will be opened. Now Google will list all the available printers available on the said Wi-Fi network.
- Select the printer you want to add and click on Add Printers.
- The printer will now be automatically added to your Google account and you could see the same on the Cloud Printing app.
So with this, we have covered the first section of the guide on printing documents using an Android device. Now we will be setting up the Cloud Printing App on your Android device. Refer to the below section for the same.
We have compiled a list of some cool hacks for Android devices that do not require root privilege. Do not forget to check them out!
https://www.droidviews.com/android-hacks-dont-need-root-even-though-thought/
Setup Cloud Printing App on Android Device
Most Android devices already come pre-installed with the Google Cloud Print. If you don’t have it, simply download it from the Play Store. Once you have installed it, follow the below instructions:
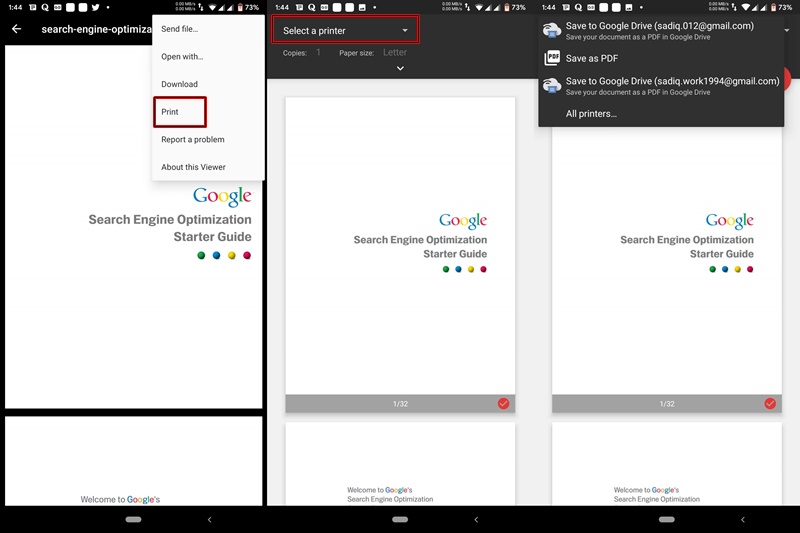
- Open any document for which you want to take a print using your Android device.
- Go to the menu options (usually represented by three vertical dots or three horizontal lines).
- Select the Print option.
- Next, from the drop-down menu at the top, choose your printer. If your printer is still not visible, you may add it by tapping on All printers and then selecting the Add printer option.
- That’s it! You have successfully taken a print out with the help of your Android device.
Print to Google Drive (Save as PDF)
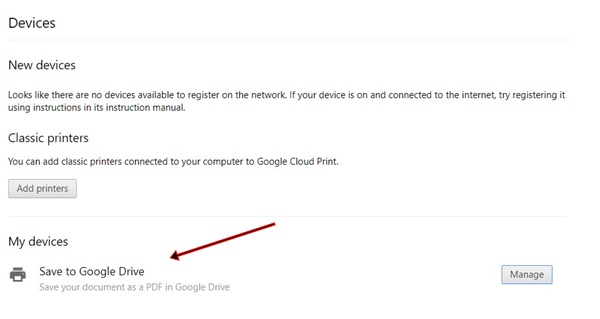
If you don’t have any printers or the printers aren’t on the same Wi-Fi network as your PC, then don’t worry. Google has something in store for you as well. You could still save these documents as a PDF file over to Google Drive. The same is applicable to the Android device as well. If none of the printers are added and you click on the Print option, then from the drop-down menu you will get the option of saving the document to Google Drive or locally on your device, both in PDF formats.
With this, we conclude the guide on how to print documents using Android devices. If you didn’t understand any of the steps, do let us know in the comments section below.
Read Next: Enable Gesture Navigation on Google Chrome for Android
