If you’re using Facebook Ads to promote your blog posts, I want to introduce you to a fundamentally more interesting way to promote content than a click campaign.
Facebook traffic ads are donkeys compared to the unicorn click-to-Messenger ad objective.
With traditional Facebook traffic ads:
- You’re probably paying $5-$6 per result.
- You’ll never know who visited the site.
- You can’t contact visitors after they leave.
Instead, promote your blog posts with Facebook Messenger ads and buckle up for insanely higher ROI:
- Lower cost per result
- Higher conversion rate
- Customer contact information
- Opportunity to follow-up
It’s an easy adjustment to your Facebook ad workflow to get the contact info of everyone who clicks on your ads and opt them into messaging, blasts and drip campaigns.
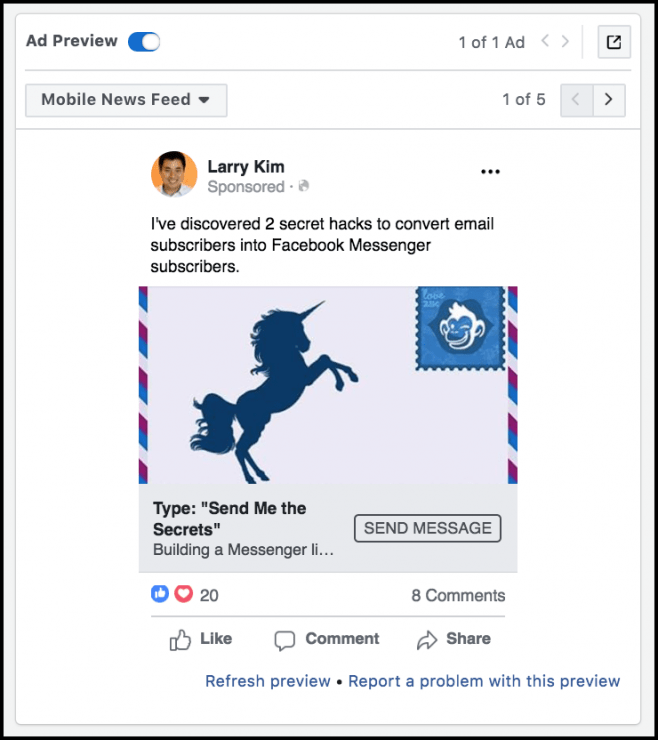
See how this Messenger ad looks in your News Feed here.
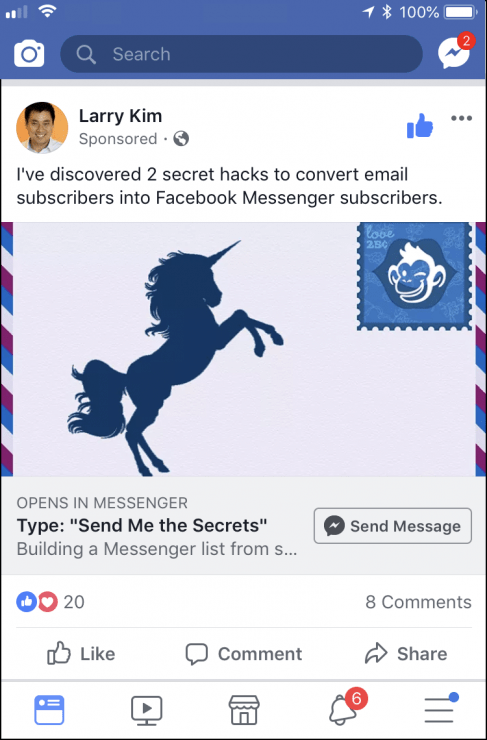
Messenger Ads for Blog Posts
Here’s how to promote your blog posts with Facebook Messenger ads.
Step 1. Create a Messenger Ad Campaign in Facebook Ads Manager.
When you start building your ad campaign, choose the “Messages” marketing objective:
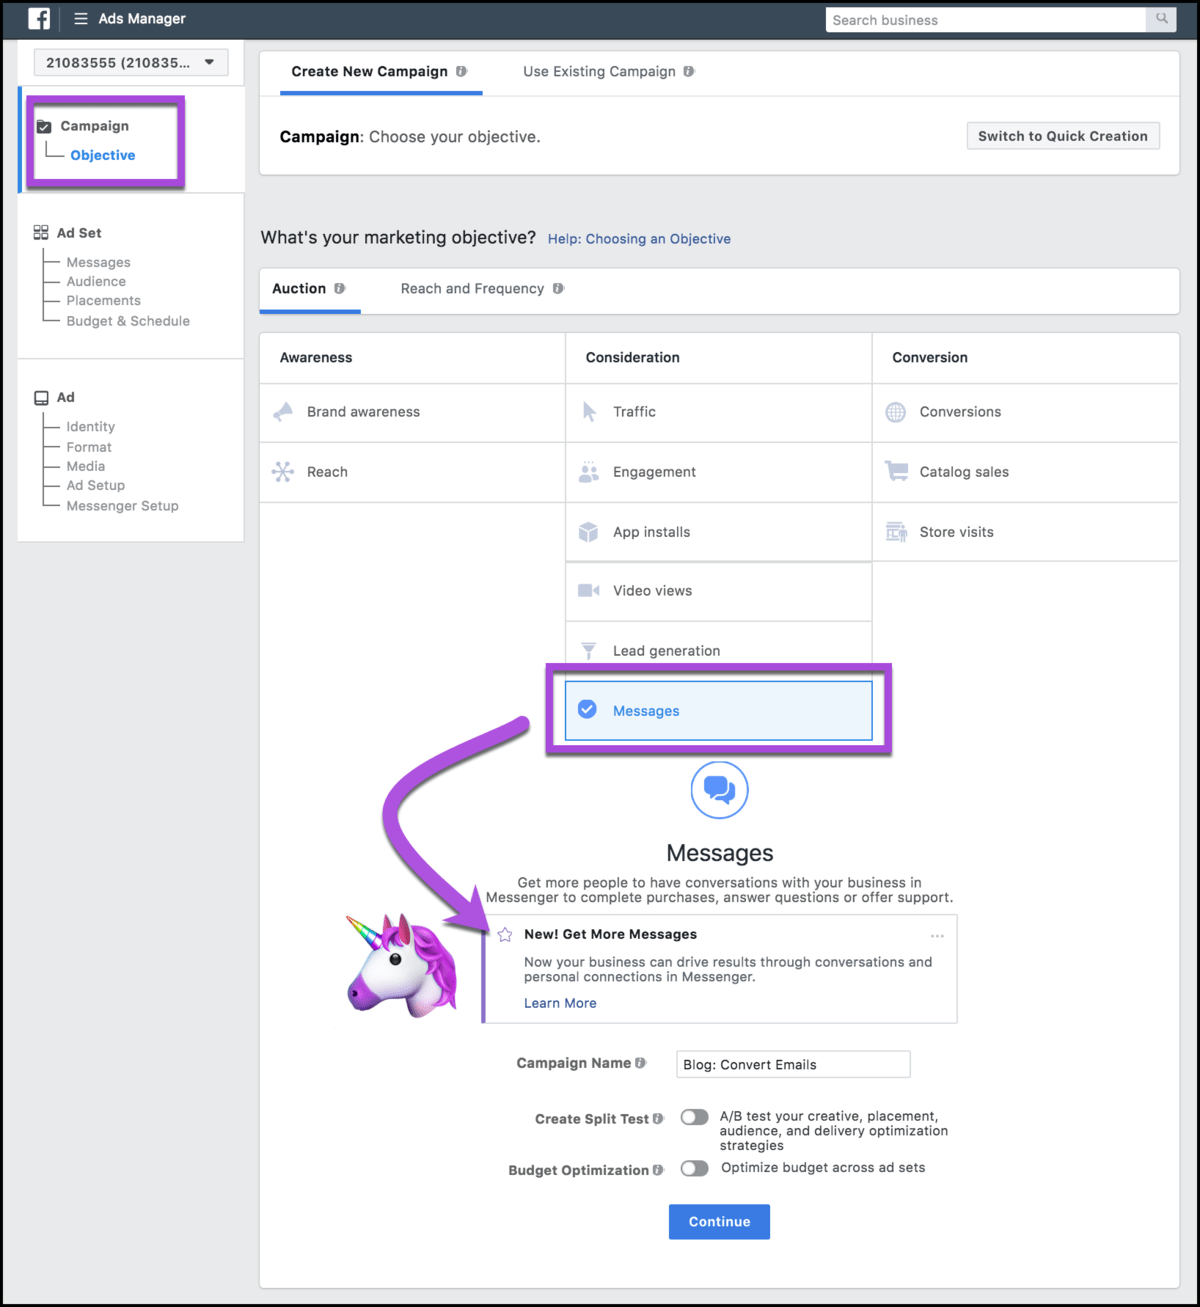
Let’s zoom in on that real quick: “New! Get More Messages. Now your business can drive results through conversations and personal connections in Messenger.”
Step 2. Build your Ad Set: Audience, Placement, Budget and Schedule.
You’ll choose your audience targeting and set your budget in the same way as usual.
I recommend being narrow and specific with your targeting. You’ll see the best results focusing on remarketing.
The most likely buyers are the people who have heard of you before, like people who have visited your site or engaged with your page recently.
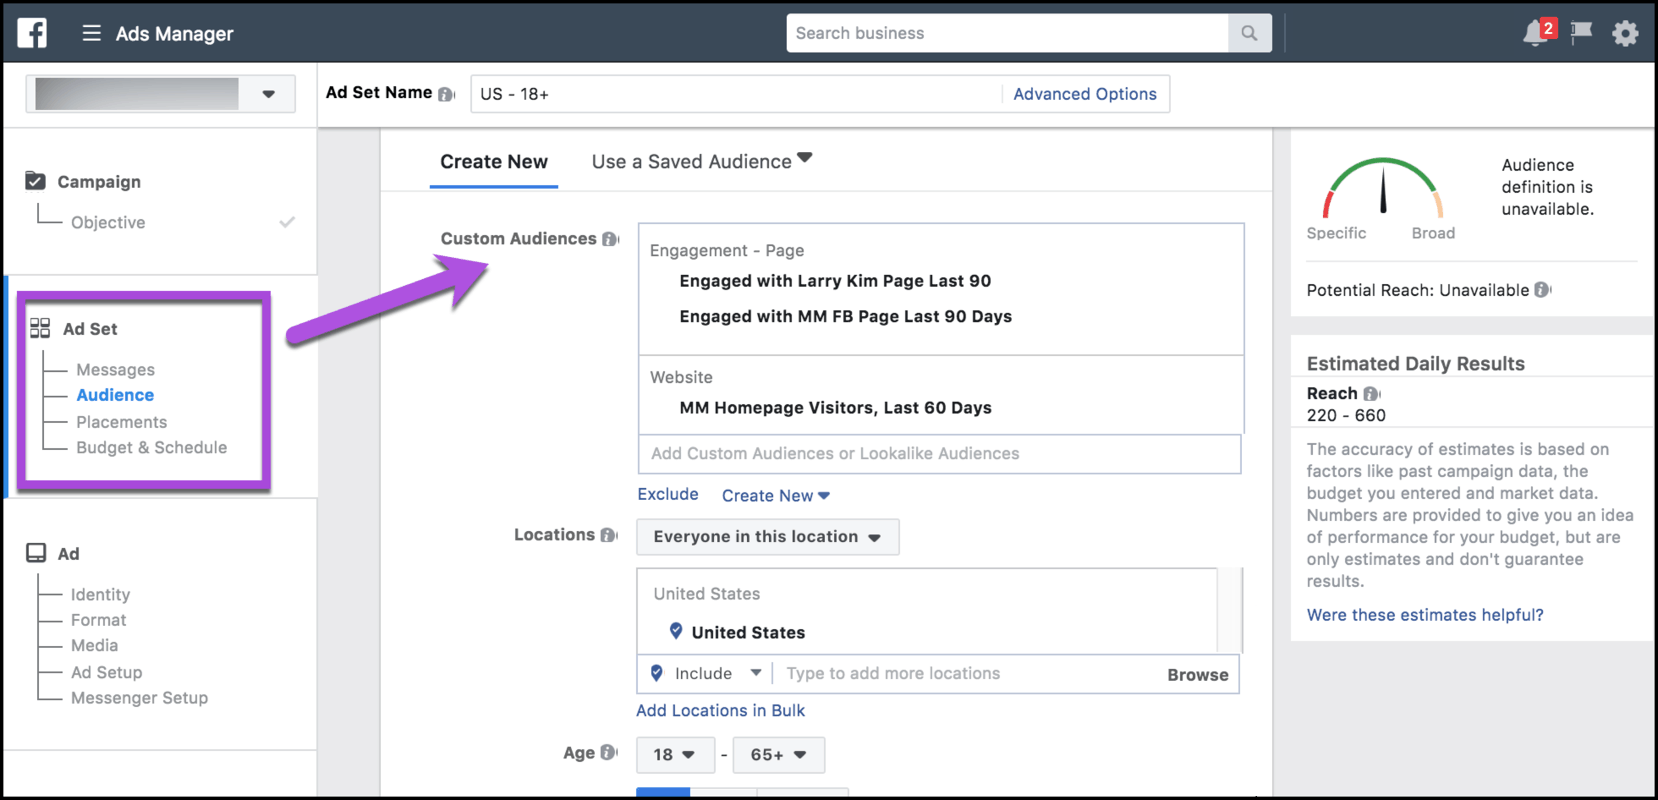
People who’ve heard of you before have a tendency to have higher click-through and conversion rates.
Step 3. Create Messenger Ad Creative in MobileMonkey.
To choose the content you want to promote, you know the drill. Unicorn content is the top 3% of posts that result in 95% of the traffic, awareness, leads and sales.
When unicorns emerge, blast them to the moon by promoting them for better visibility with Facebook Messenger ads.
We’ll use this blog post on how to convert email contacts to Messenger contacts for today’s rocket-fueled unicorn content.
To create the landing page for this content in Messenger, use the chatbot builder.
Groups let you organize your Messenger ad pages together.
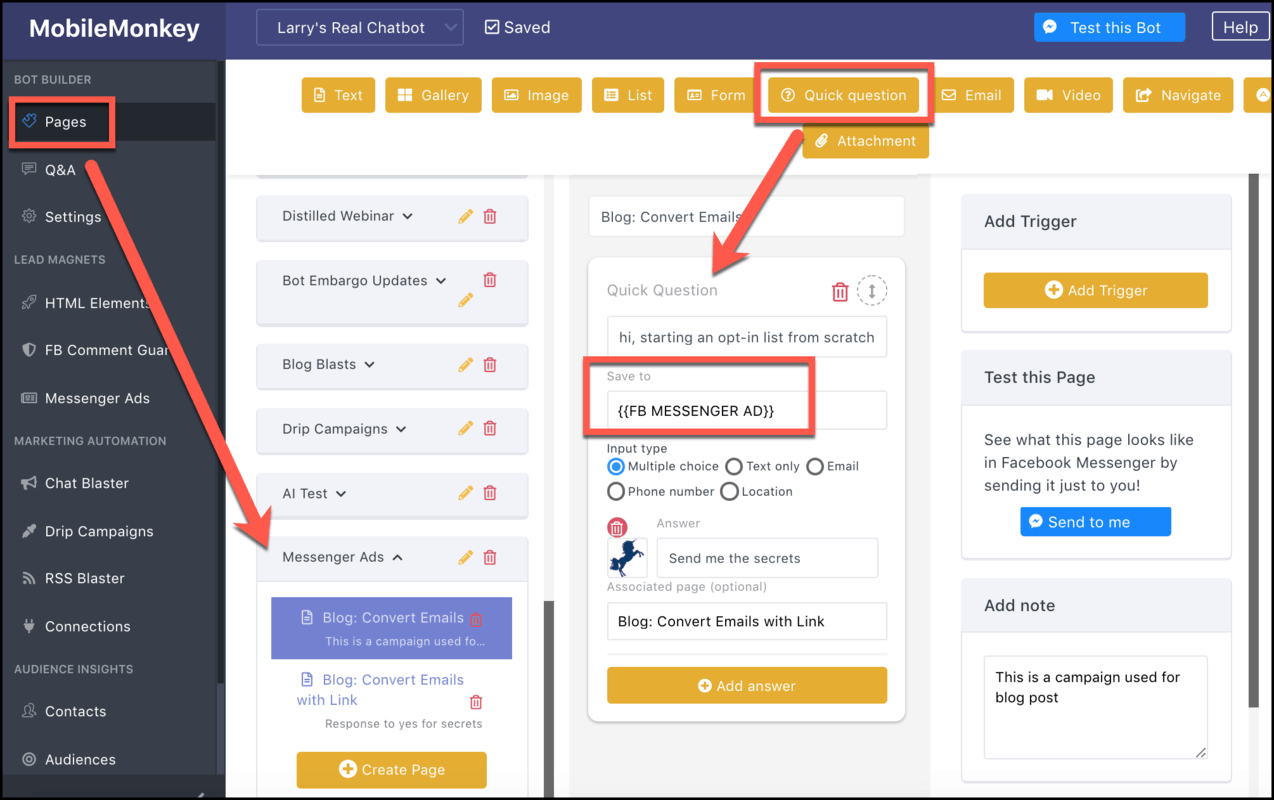
Use the Quick Question widget to start the conversation out with a simple question that’s easy to respond to with the tap of a button. This is key.
Here’s what this quick question looks like in Messenger after someone taps the “Send message” button in the ad:
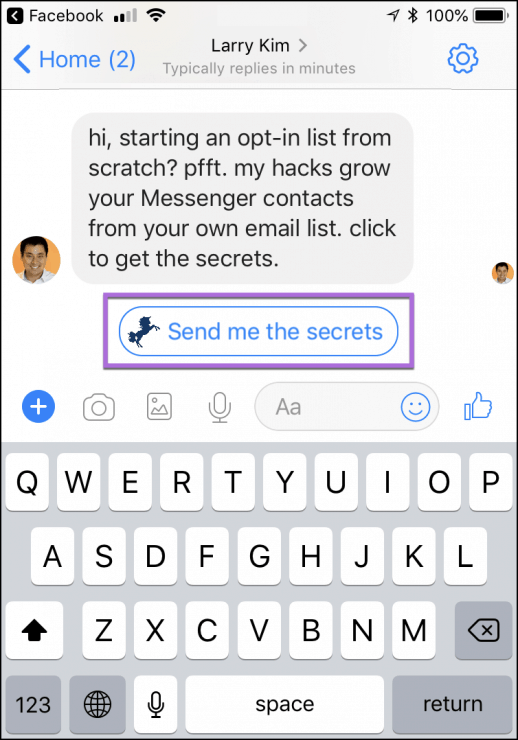
Quick Questions also save custom attributes to your contacts.
So, along with getting the contact info of every new Messenger contact created from your campaign, you can create a custom audience segment from this attribute.
Custom audiences allow for follow-up messaging, like chat blasts and drip campaigns, in the future.
For those who engage with the message and click “send me the secrets,” we built one more page that links to the content:
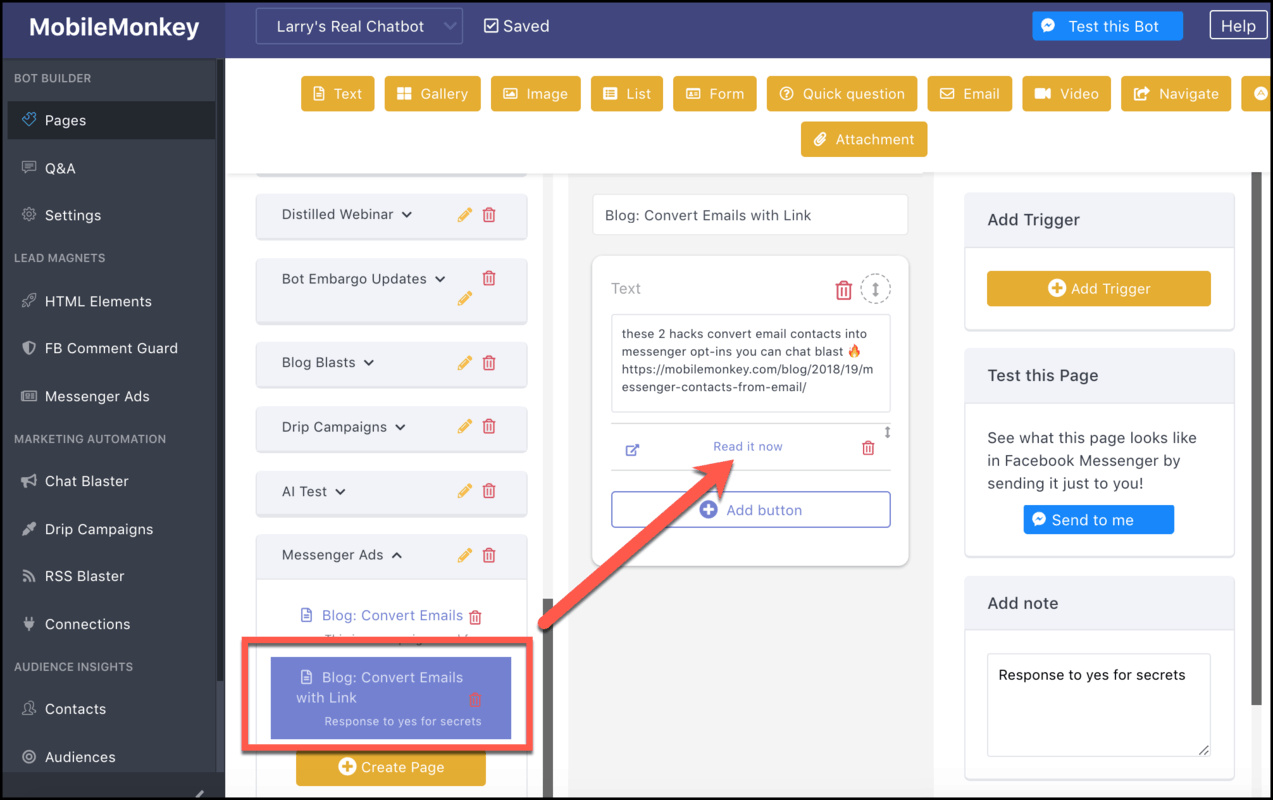
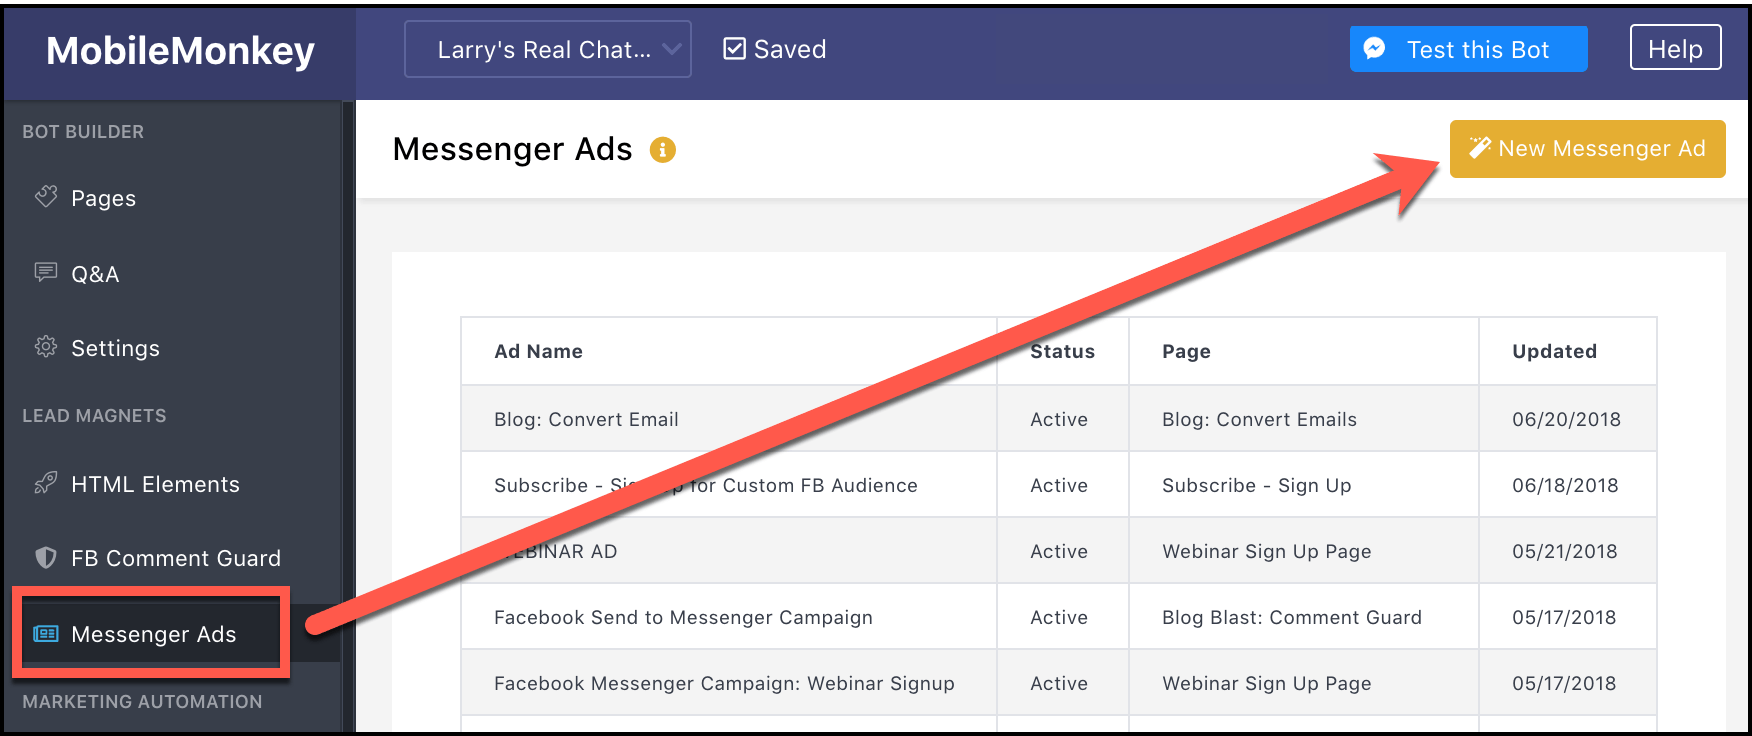
To turn this content experience into an ad, go to Messenger Ads in MobileMonkey and create a “New Messenger Ad”:
Use the drop-down menu to choose the page you’re using as your Messenger ad landing page:
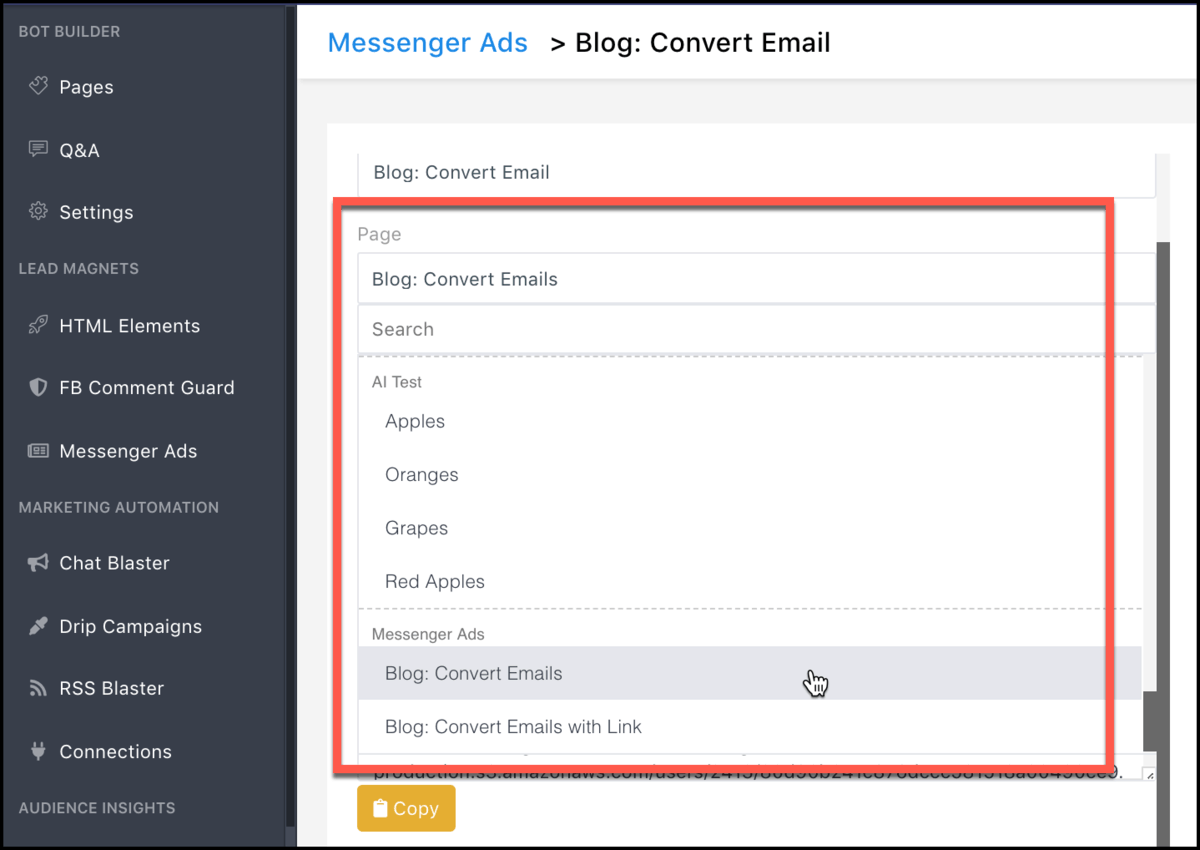
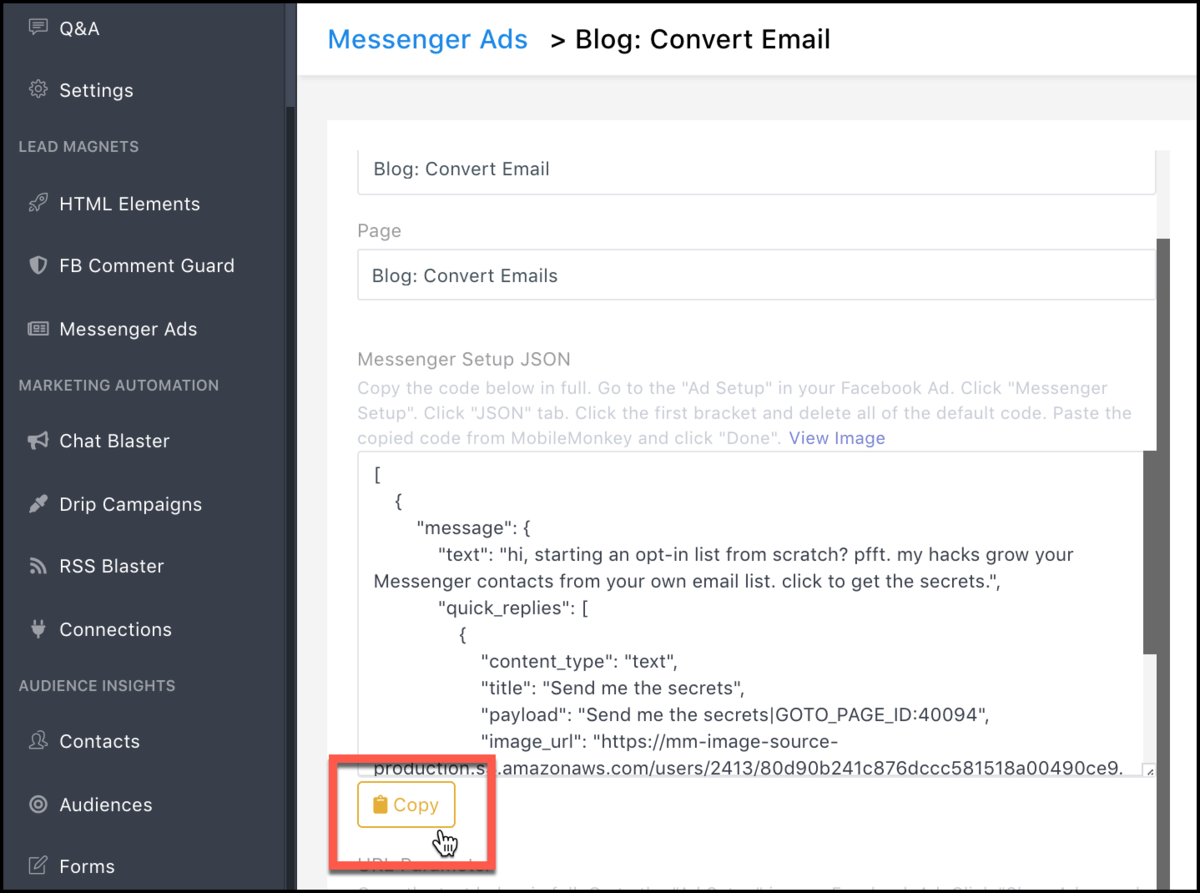
You’re going to need to copy two things from this page into your Facebook ad set up in step 4 — the JSON code and the URL parameter.
Click “copy” on the first button to copy the JSON code to your clipboard:
Step 4. Finish Ad Setup, Copying and Pasting the Code from MobileMonkey to Ad Manager.
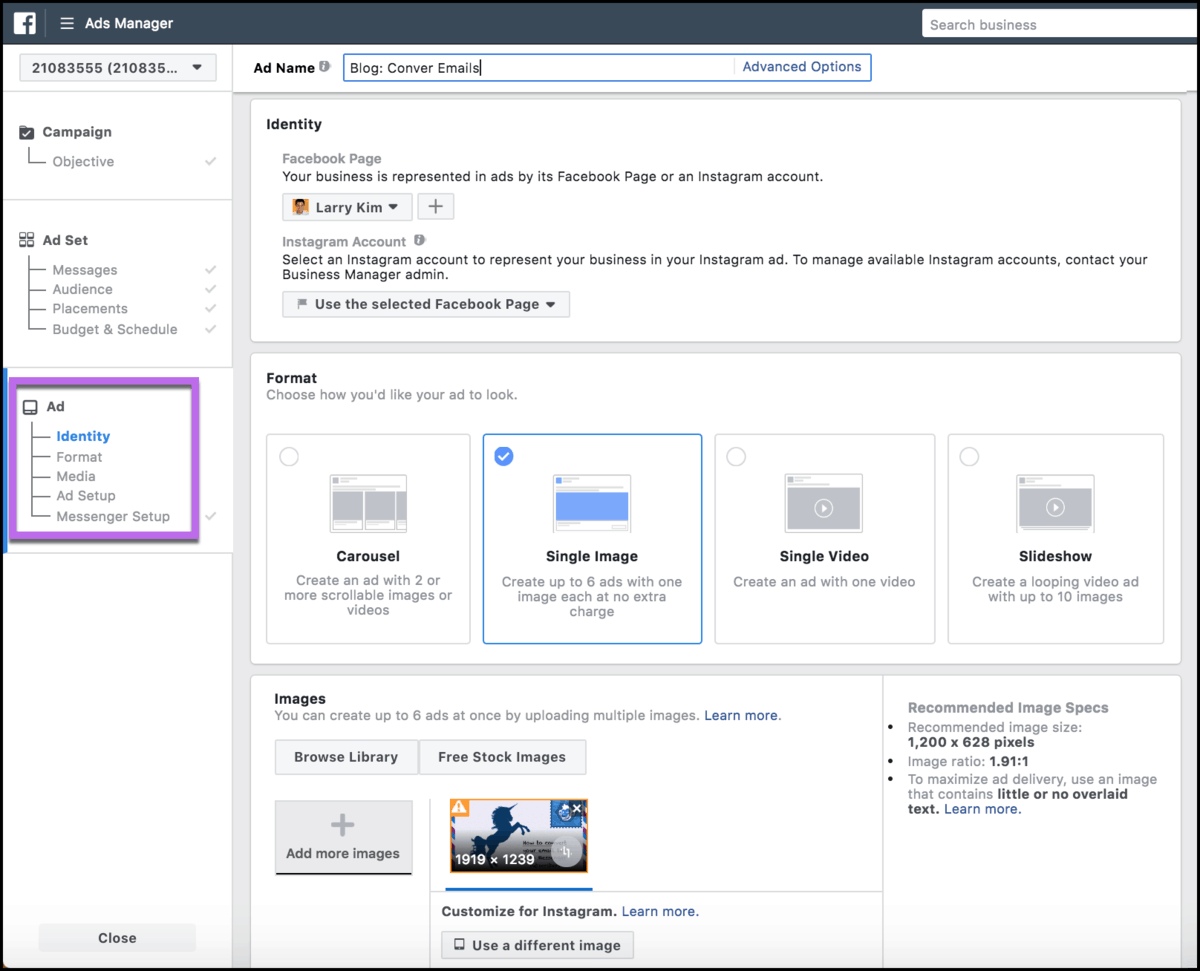
Head back to Facebook Ads Manager to finish the ad setup.
You’ll pick the identity or Facebook page, ad format (carousel, image, video, slideshow) and upload imagery:
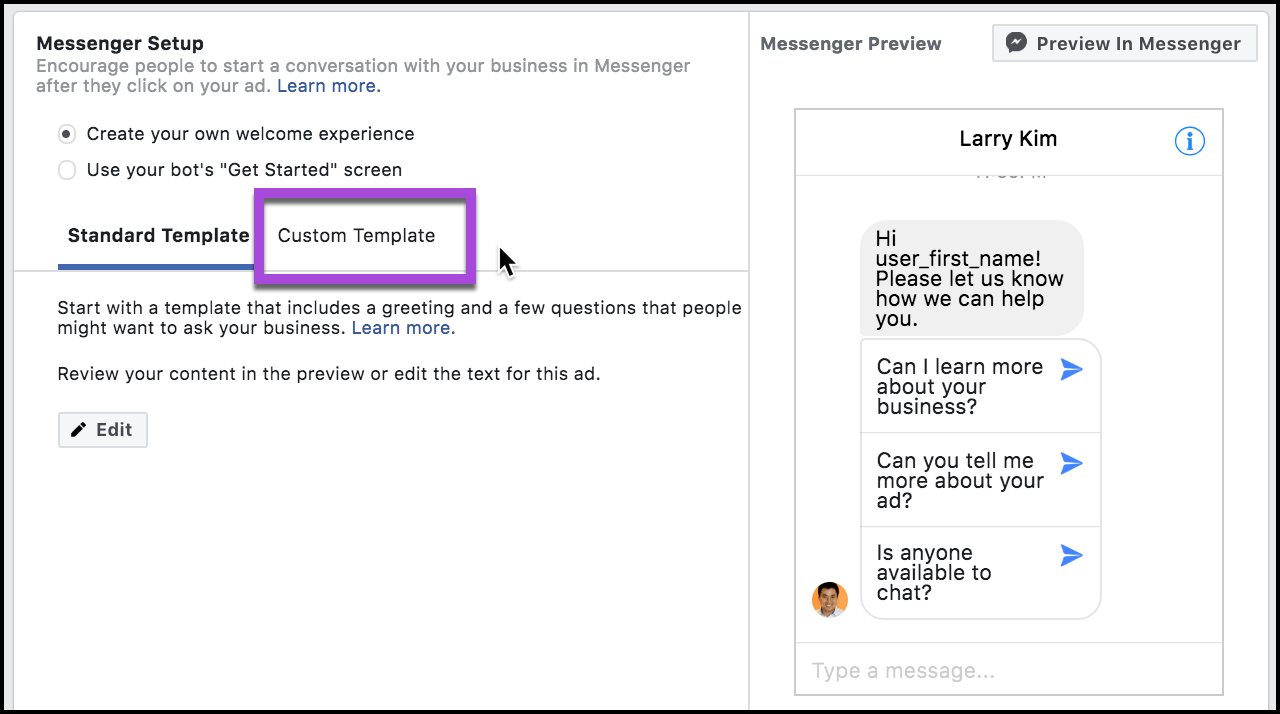
Now we’ll paste the code from the clipboard into the Messenger setup by selecting custom template:
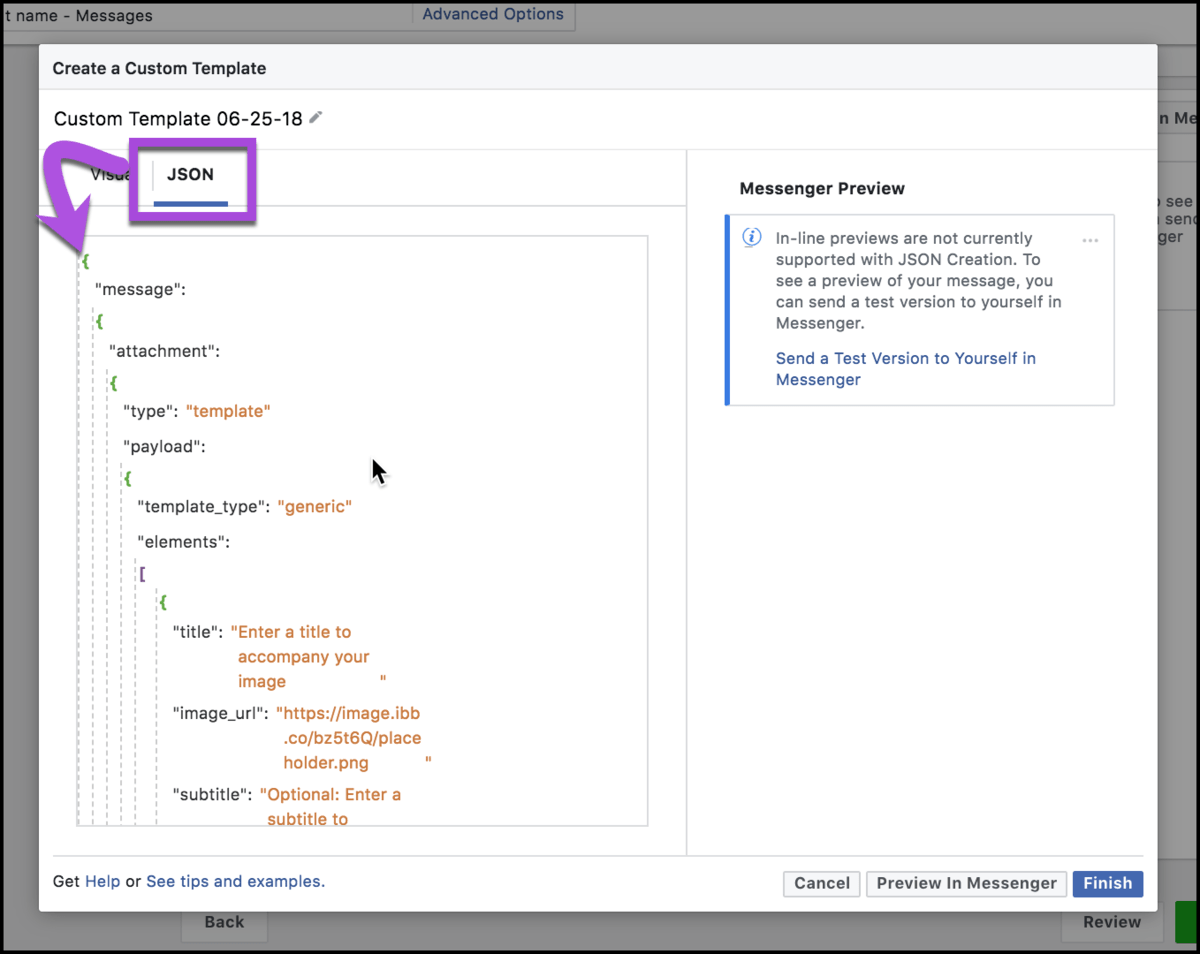
And then choosing the “JSON” tab, click the first bracket, highlight all and delete it. Paste your copied code here.
Go back to MobileMonkey to copy the URL parameter as well:
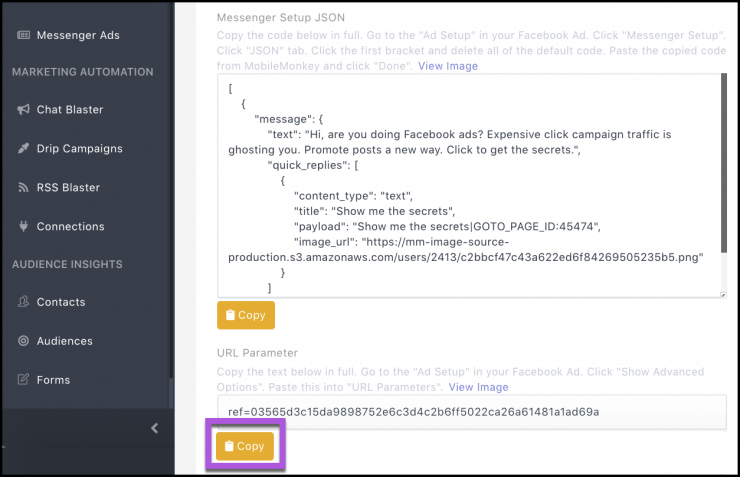
Paste that into the Facebook ad setup under “Tracking”:
![]()
Preview your ad and finish it to go prime time:
Step 5. Review the Results.
Here are our results from this Messenger ad campaign:

- Budget: $130
- New Messaging conversations: 26
- Cost per result: $2.59
What else did we get?
We got the contact info of people who engaged with our ad.
We can contact everyone who clicked to invite them to subscribe and engage further with Facebook Messenger marketing automations, like drip campaigns.
And we didn’t spend money for anonymous traffic with no way to follow-up. Is it just me or is it crazy that this is the normal thing to do…
Stop doing donkey click campaigns with Facebook Ads.
Promote your unicorns with unicorns — the new Facebook Messenger ad format.
Republished by permission. Original here.