Disclosure: This content is reader-supported, which means if you click on some of our links that we may earn a commission.
Are you planning to launch an online store? Your timing couldn’t be better.
The ongoing pandemic has caused online shopping to soar, with most people staying home.
But that doesn’t take away the challenges involved in launching an online store, especially if you don’t have any ecommerce experience.
Where do I begin? What can I sell? Where do I source your products from? How do I create an online store? Wait, I’ll need a web host, too?
So many questions!
Don’t worry, though—I have you covered.
In this article, I’ll give you a comprehensive step-by-step guide to help you launch your first online store, making sure you avoid making common and not-so-common mistakes and get your site up and running ASAP.
Are you ready? Let’s begin!
Your 2-Minute Cheat Sheet
Want to skip the details and get a quick cheat sheet? Here you go.
You have to decide what you want to sell and how you’re going to get the products. And while you’re at it, you must also consider the product’s prices, your target audience, and whether or not there is an audience for your product.
After all, why would you want to sell a product nobody wants to buy?
You can choose a product that metaphorically “scratches your own itch.” Or you can also consider buying a product that already exists, improving it, and then doing a better job of marketing it. This is sometimes known as drop-shipping.
I would personally recommend the second option for first-time entrepreneurs as it considerably lowers the risk out of selling.

If you agree, head over to Alibaba.com to find suppliers for your chosen product. While Alibaba is one of the more popular marketplaces, it doesn’t mean that there aren’t frauds on the platform.
To make sure you deal with genuine suppliers only, look for the Gold Supplier icon. This indicates that a particular supplier has signed up for a paid membership. Therefore, it’s unlikely for any fraud to have the Gold Supplier icon on their profile.
If you decide to go forward with the supplier, make sure you order sample products to determine the quality you should expect. Don’t forget to discuss payment terms and other details so that you and the supplier are on the same page.
With the products in place, you’ll have to figure out a good name for your brand and check whether a domain name is available. While this sounds incredibly fun, it can quickly turn annoying.
Keep patient, though.
Consider your domain name as a long-term investment, and try to come up with the best you can.
Next up, you have to set up your online store platform. Consider selling your products on either Shopify or Amazon—both are equally good.
Finally, work on optimizing your site by including targeted keywords in your product descriptions. This is an excellent way to drive more organic traffic to your website rather than partaking in more cumbersome marketing strategies.
If I’m honest, though, you’ll still need to look for other ways to promote your shop, such as on social media platforms like Facebook and Twitter.
Step 1: Figure Out Your Niche
Since you’re going to set up an online store, you’ll need a product. The very first thing you should do is decide what you’re going to sell and who you’re selling it to.
Many first-time entrepreneurs make the mistake of not putting enough thought into deciding their niche, which includes the product’s price, the audience to whom the product is aimed, and the market opportunity.
Don’t make this mistake.
Always remember your product matters the most—both in terms of quality and relevance. You have two options here: you can either create something you need or source something from elsewhere, make it better, and then market it.
I’ll recommend choosing a niche that isn’t already dominated by a few brands.
Let me explain this with the help of two scenarios.
- Scenario 1: Your headphones stop working. You want to replace it, so what do you do?
You‘ll either place an order online from sites like Sony, Bose, or Beats. Or maybe visit the physical stores of these brands.
- Scenario 2: You’ve moved into a new house when you realize that you want decorative lights for your bedroom.
You’ll likely Google “decorative lights for bedrooms“ or “buy decorative lights with free shipping.”
Do you see the difference in your behavior?
Niches dominated by a few brands aren’t really profitable for first-timers. Trust me, customers don’t even think about alternatives as their brand loyalty kicks in almost immediately.
Instead, it’s much better to stick with niches and products that don’t have a couple of specific brand names associated with them.
You can also use Amazon to check out the competitors in your niche. Try to identify common features that could help you improve your product. For instance, you can have thick paper notebooks or reinforced steel for bottles. Basically, stuff that will help improve the quality of effectiveness of your products.
Next, you’ll need to work on sourcing the products.
Step 2: Source Products From Alibaba
Alibaba.com is one of the most popular marketplaces when it comes to sourcing products. Many people in the ecommerce industry already use this site, so it makes perfect sense for you to source your products on this platform, too.
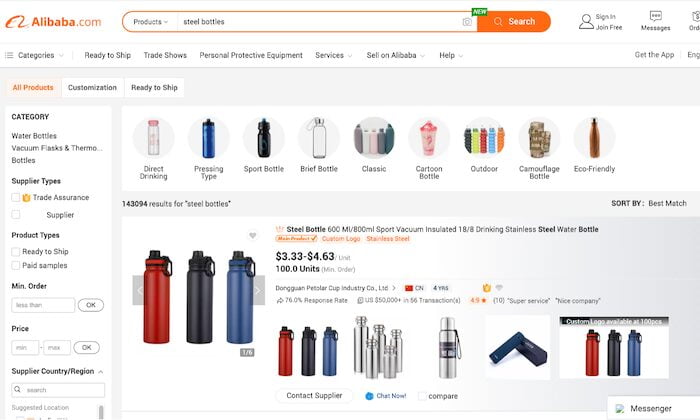
But how do you go about this? Let’s assume you want to sell steel bottles.
Search for “steel bottles.” You’ll now see a list of suppliers selling all kinds of steel bottles at different prices.

Next, you’ll have to contact a few of them to see whether they would be a good match for you. You first need to figure out your requirements before you get in touch with them. Otherwise, you’ll be wasting everyone’s time.
The way to distinguish genuine sellers from frauds is to look for the Gold Supplier mark. Gold Supplier is a paid membership for suppliers on Alibaba.com, which indicates that the business is serious about trading with other international companies.
Take a look at this screenshot:

It shows that this particular supplier has been a Gold Supplier for three years. Since they have to pay for this recognition, you can be sure that they will be serious when negotiating with you.
You must discuss payment terms and minimums and other things so that every detail is explicitly clear to avoid misunderstandings in the future. I’d also recommend ordering sample products before you place a big order to get a better idea of what you’re going to get and the shipping times.
Step 3: Pick a Name for Your Brand and Get a Domain
Now comes the exciting—and at times frustrating—part of starting an online store: Choosing an appropriate name.
Once you start looking for options, you’ll realize how the best names have already been trademarked and website domains already registered.
It’s like hitting one dead end after another!
But don’t give in just yet, as finding a good name is an effort well worth the pain (and tears).
Here’s a quick checklist you should follow:
- It should be easy to spell and concise – three words or shorter.
- It should have a .com domain
- It must reflect your chosen niche
- It cannot be already trademarked by other people—the legal hassle is costly and very troubling.
Take my domain as an example. NeilPatel.com is short, concise, and reflects my brand. You do not have to use your name. That was just a choice that was right for me.

The good news is there’s an option for you to get a domain without having to pay the registration fee. Most web hosting services offer users a free domain—provided you choose a company that provides this feature like Bluehost or Wix.
I highly recommend this method, as you get free .com domains with full ownership that’ll make you look more professional and credible to your visitors. Plus, if you’re already going to purchase a web hosting plan, why not select an option that offers you a free domain?
Purchasing a web hosting plan, typically as a one, two, or three-year contract, is necessary. Think of the free domain as a bonus to your investment.
The next crucial step is setting up your ecommerce store on a platform that’s easy to use and offers good customer support.
Step 4: Set up Your Online Store Platform
Shopify and Amazon are two of the most popular and user-friendly e-commerce sites.
You can also use WordPress + WooCommerce if you want. But that’s best for times when you already have a blog with a large audience. This way, you won’t have to put in an extra effort to drive traffic to your ecommerce store.
Option #1 Setting Up Your Shopify Account
Shopify has over 218 million buyers from 175 countries. So you can imagine the number of people who trust this ecommerce site.
You can start the 14-day free trial to get a feel of Shopify’s features. If you decide to move forward with it, you’ll upgrade to the paid plan.
The first step is to enter a store name, which will also become the default URL to start your trial. For example, if you want your Shopify’s store name to be JoshBeans, your URL will be joshbeans.myshopify.com.
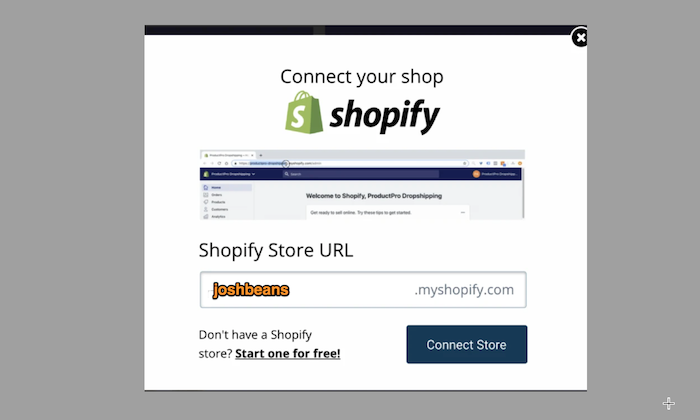
If you buy a custom domain (joshbeans.com), you’ll be able to get rid of the ‘myshopify’ part.
Complete further instructions as asked. Then you have your own Shopify account.

To customize your store further, visit https://themes.shopify.com/ to select a theme to make your store more on-brand with what you sell and to fit your brand.
What’s more, you can talk to a Shopify Expert if you need help with the technical aspects of setting up your store or find yourself stuck at a specific place.
Option #2 Setting Up an Amazon Account
You also have the option to display your products on Amazon.
Go to Amazon and scroll down to the bottom of the homepage. Select Sell on Amazon.

Sign up to become an Amazon seller. You can sign up as an individual seller or a professional seller. In my opinion, it would be better to become a professional seller if you’re in for the long haul.
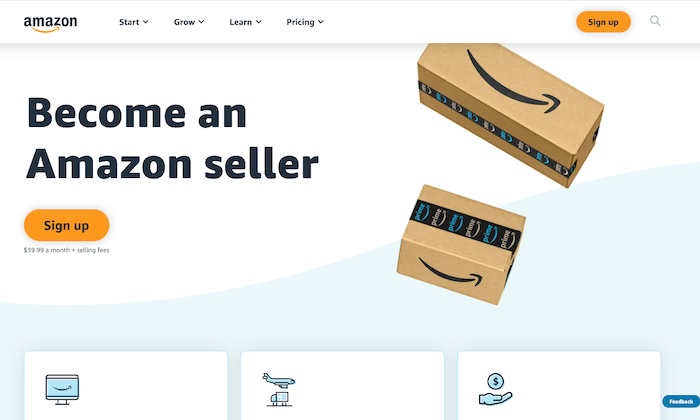
After setting up and verifying your identity, you can start with listing your products. Before this, make sure you go through the details of the selling process on Amazon.
Then click on Inventory followed by Add a Product. This will open up Amazon‘s catalog, where you’ll have to search for the product you want to sell.
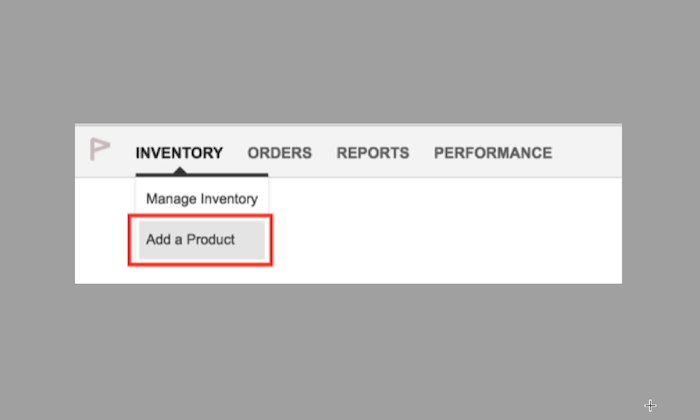
You can also create a new product listing if you can’t find a suitable option.
And that’s it! You can now start selling your product on Amazon.
Before you can start listing your products, make sure you have high-quality photos of them, preferably on a white background. Similar to this:

Step 5: Optimize Your Site
If you think customers will come to you just after you launch the website, we have news for you: Not going to happen.
Instead, you need to optimize your website to attract traffic through search engines by targeting SEO keywords in your product descriptions.
Write good copy for every listed product, taking care to mention their USPs and describing them explicitly.
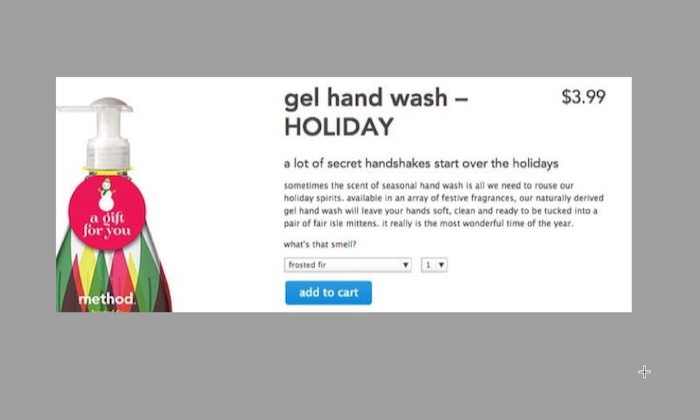
This will involve you focusing on two primary areas:
- You have to target your product pages to specific terms that are typically searching for within the platform
- Work on getting as many five-star reviews you can on your products as possible
The above two tips are instrumental in improving your search terms and reviews, enabling more people to see your products on the platform. This will translate into more sales and revenue for you, which is exactly what we want.
Conclusion
Congratulations! You now have your online store up and running.
From figuring out what you want to sell and sourcing it to choosing a reliable ecommerce site to display your products, you are now an expert when it comes to launching an online store.
But don’t celebrate too hard—you have to next work on spreading the word about your store to get customers to purchase your product or service. When the money starts rolling in, I’ll be expecting a party.
Here’s wishing you all the luck!
