The new iPhone 11 series of phones brings a new way to frame and shoot photos that gives you flexibility after you’ve snapped that shot. The iPhone 11, 11 Pro, and 11 Pro Max all bring in detail outside your framed preview from the next widest lens as you point at a scene in both portrait and landscape.
 IDG
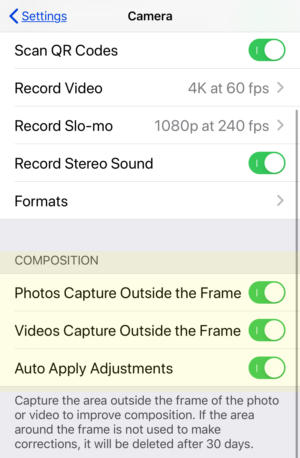
IDGIn the Camera settings in iOS 13, you need to switch on Photos Capture Outside the Frame to use the over-capture feature.
First, you have to turn the feature on in Settings > Camera under the Composition section. Tap Photos Capture Outside the Frame to turn this over-capture mode on. By default, Apple has left the feature off, though the same option for video is enabled. (There’s a potential reason for this, which I’ll get to at the end of this article.)
A related option works in concert with Capture Outside the Frame. Auto Apply Adjustments, a switch in the same area in Settings (turned on by default), causes the Camera app to try to straighten and improve photos and videos shot at 1x without you having to intervene at all. (Apple’s documentation says if an automatic adjustment is applied, you see a blue AUTO badge in the media-browsing mode, but I haven’t seen this appear in any form yet.)
There doesn’t seem to be a penalty to leaving that option turned on, however, as you can still adjust images later, even if the Camera app has already applied its suggested improvement.
Use Capture Outside the Frame
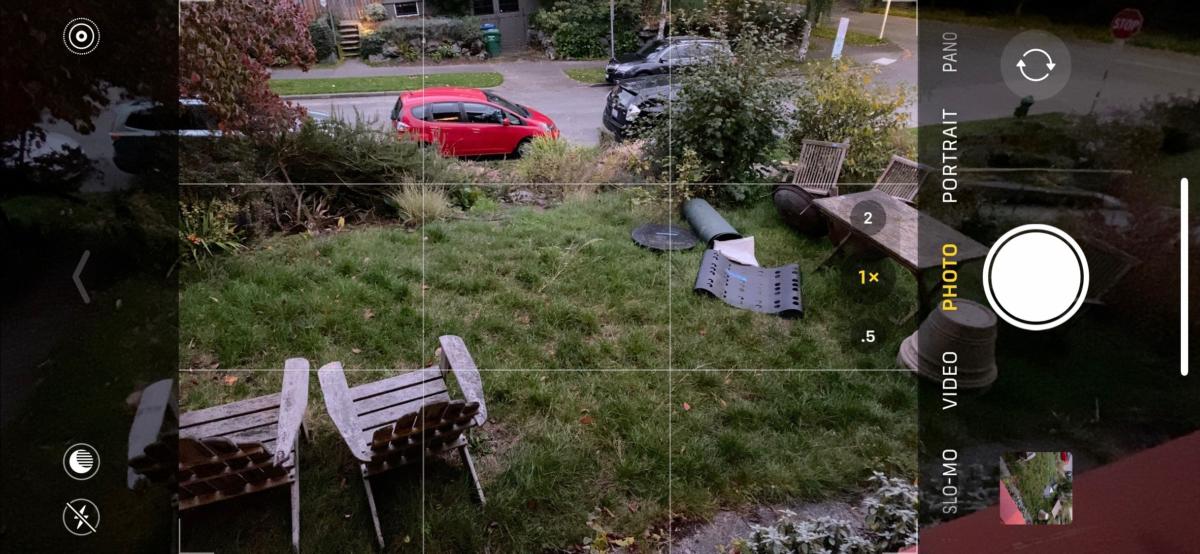
With the option enabled, you’ll notice that when you’re shooting either in the 1x mode on any of the iPhone 11 models or the 2x mode on an iPhone 11 Pro and 11 Pro Max, a dimmed area appears outside the main camera frame indicating the over-captured image. In portrait mode, that’s above and below the framed area; in landscape, it’s at left and right.
 IDG
IDGThe Camera app shows the area captured outside the frame as slightly faded detail.
This additional information is acquired from the next wider camera on the phone and then scaled down to match—no detail is lost, but the extra data is downsampled, or reduced in pixel density. In 1x mode, the next lens “down” is the ultra-wide-angle lens, while the primary image comes from the wide-angle one. When shooting in 2x on a Pro model, the telephone lens is supplemented with the wide-angle camera.
When you first bring up the Camera app, that shaded area doesn’t appear instantly. Rather, it fades in. Apple doesn’t explain whether that’s an interface choice or a hardware one, but I suspect given the computational firepower built into the camera’s processing system that the gradual appearance is designed to avoid distraction, instead of a requirement to activate the second camera.
The image area outside the frame won’t appear when it’s too dark for the next-wider lens to function well: the ultra-wide-angle lens captures substantially less light than the wide-angle, so without at least moderate amounts of light, it can’t contribute. I’ve tested this in fairly dim indoor environments, and still had the out-of-frame image appear. I had to find an area that was quite dark for it to drop out.
The over-capture also disappears when you’re within several inches of an object.
 IDG
IDGA tiny badge in Photos indicates image data outside the frame was captured (red highlighting added).
You can take a picture as you normally would with perhaps less worries about perfect framing. There’s no extra step in capture.
How to adjust a photo after capture
You gain access to this additional information in Photos after shooting. Images that have outside-the-frame data are marked with a special badge in the upper-right corner, only when viewing the image, not its preview. The badge is a dash-bordered square with a star in its upper-right corner. It’s easy to miss.
Tap the Edit button and then tap the Crop button. In my testing, I’ve found that sometimes images that are marked with the over-capture badge don’t reveal extra information in editing! This seems like a bug, or perhaps there’s an additional indicator that needs to appear.
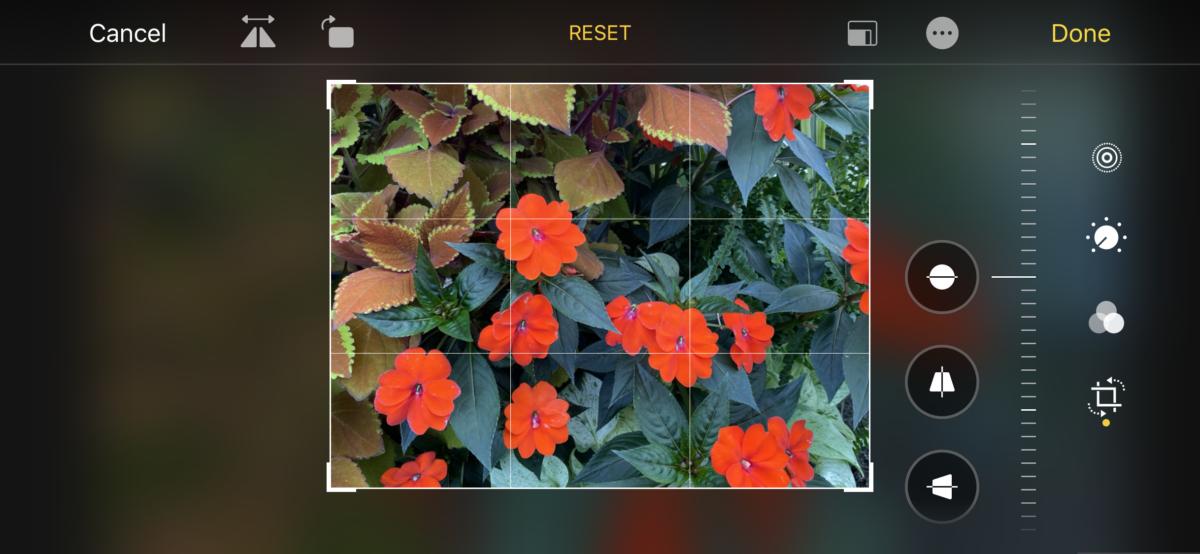
For images that actually have the information present, you see a faint haze surrounding the frame. You can drag cropping edges or corners or pinch to zoom or expand to access to the additional image data, which immediately appears as you change the crop.
 IDG
IDGWhen you tap the Crop tool, Photos indicates there’s extra area by hinting at it as a blur beyond the boundaries.
 IDG
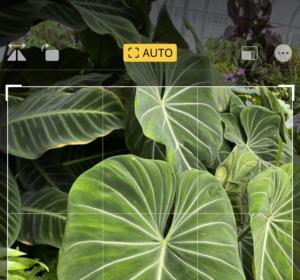
IDGIf Photos decides to correct an image for you, it marks it AUTO at the top.
What may be confusing, however, is that the Crop tool may already detect on invoking it that the image requires adjustment to make it level. It relies on cues in the background, and automatically straightens or deskews—new in iOS 13 and iPadOS 13—when you tap the Crop button.
If so, you see a brief animation of the image adjustment and a label appears at the top of the image: a dash-bordered square with the word AUTO to its right, both reversed out of a yellow bar. If you want to override that adjustment, you can tap AUTO like it’s a button (it is!) and the changes are removed.
In macOS 10.15 Catalina, even with iCloud Photos enabled, the over-captured area doesn’t appear accessible in Photos for macOS. This might change, but for now it looks like the extra information is either stored or only accessible in iOS and iPadOS.
Apple says the over-capture area is retained for 30 days after the picture is taken. At that point, it effectively re-crops the photo to the frame as shot. I suspect this is handled cleverly using the HEIC (High Efficiency Image Coding) package that the company started using in OS releases in 2018. This package allows the efficient storage of multiple images, making it easier to combine them in an app for display and discard elements without rewriting the primary image.
Refusin’ Deep Fusion
One warning and tip about Capture Outside the Frame: If you have the feature turned on, the upcoming Deep Fusion machine-learning-based addition to the Camera app is disabled. Deep Fusion, coming in iOS 13.2, uses machine-learning algorithms to produce photos that assemble richer details and tones than even the Smart HDR feature already present.
Deep Fusion handles the controls of multiple cameras to capture multiple inputs and images simultaneously and then process them. There’s a thought that Apple left Capture Outside the Frame turned off “out of the box” because Deep Fusion was coming.
By the same token, if you don’t always want to use Deep Fusion, Apple provides no switch in the current beta testing stage to turn it off. Capture Outside the Frame thus becomes an implicit on/off switch for Deep Fusion, too.